AA User Manual
Project Dashboard
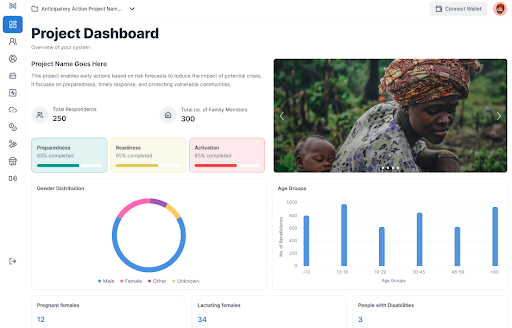
Within each project, you can access the Project Dashboard to get an overview of key information and progress.
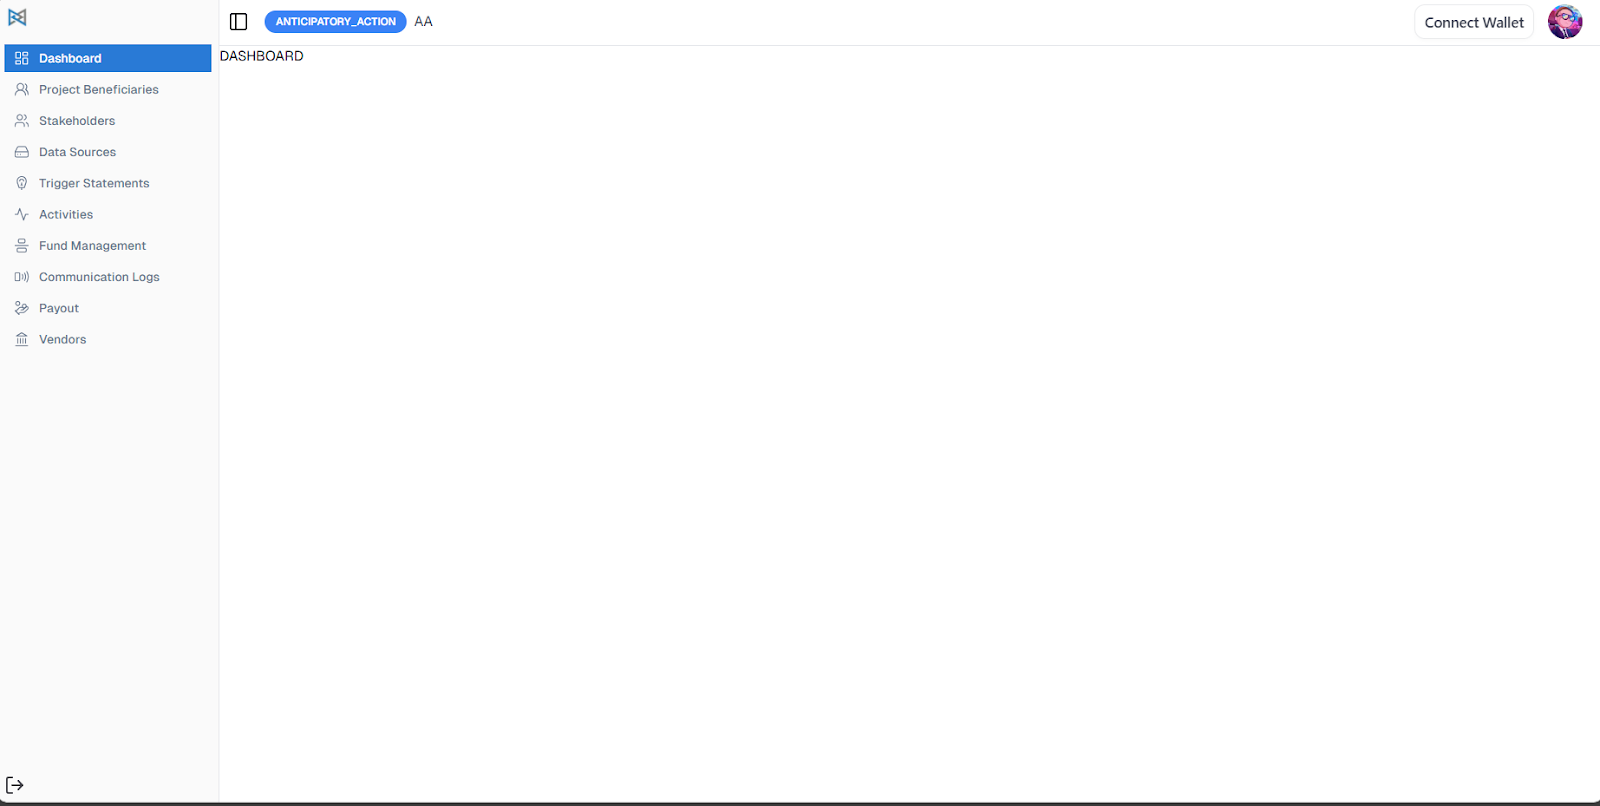
The navigation bar at the top of the project interface allows you to explore various sections, including:
- Dashboard
- Beneficiaries
- Stakeholders
- Forecast Sources
- Trigger Statements
- Fund Management
- Payout
- Activities
- Communication Logs
These sections help you manage different components of the project, from tracking beneficiaries and stakeholders to managing funds, monitoring triggers, viewing forecasts, and logging communications.
Project Beneficiaries
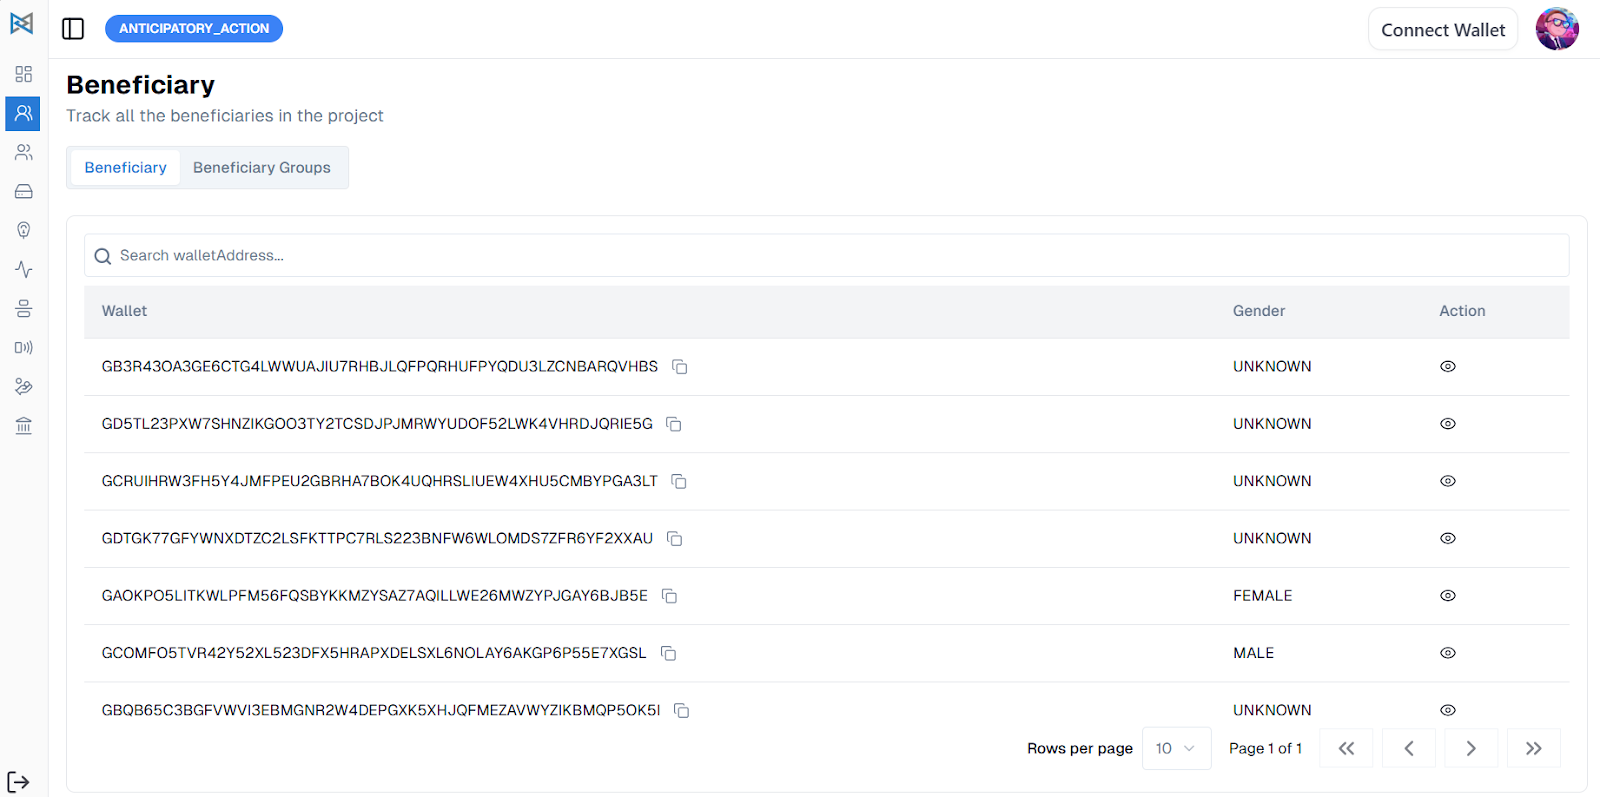
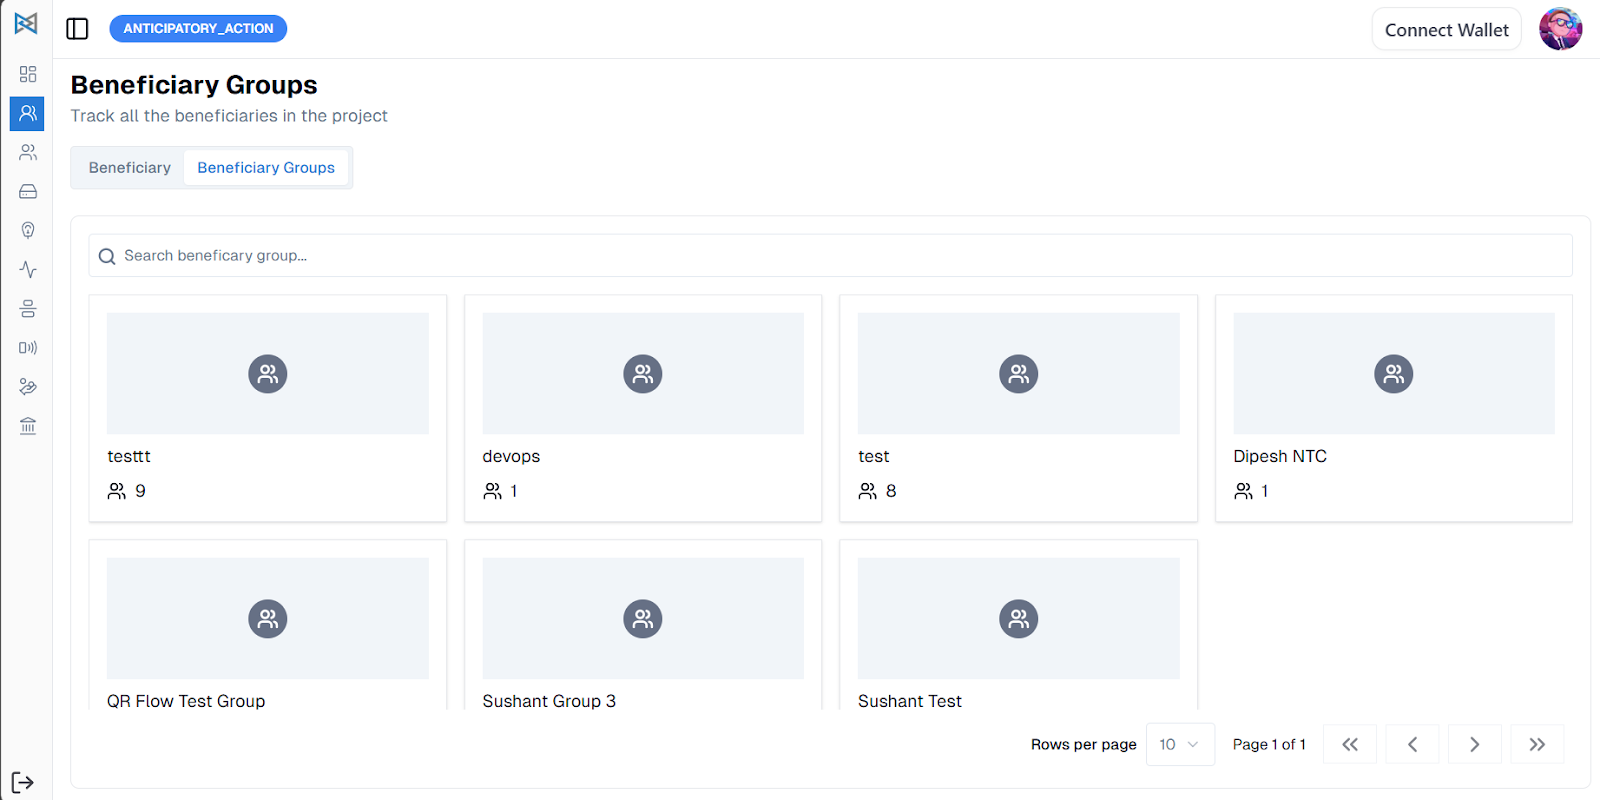
The beneficiaries assigned to a specific project can be viewed within that project's details. However, personally identifiable information (PII) of the beneficiaries is not displayed to ensure privacy. In the Project Beneficiaries section, you can view both the list of individual beneficiaries and the list of beneficiary groups associated with the project.
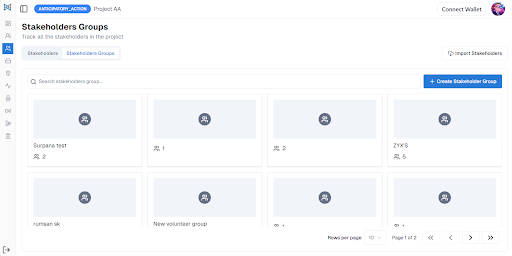
Stakeholders
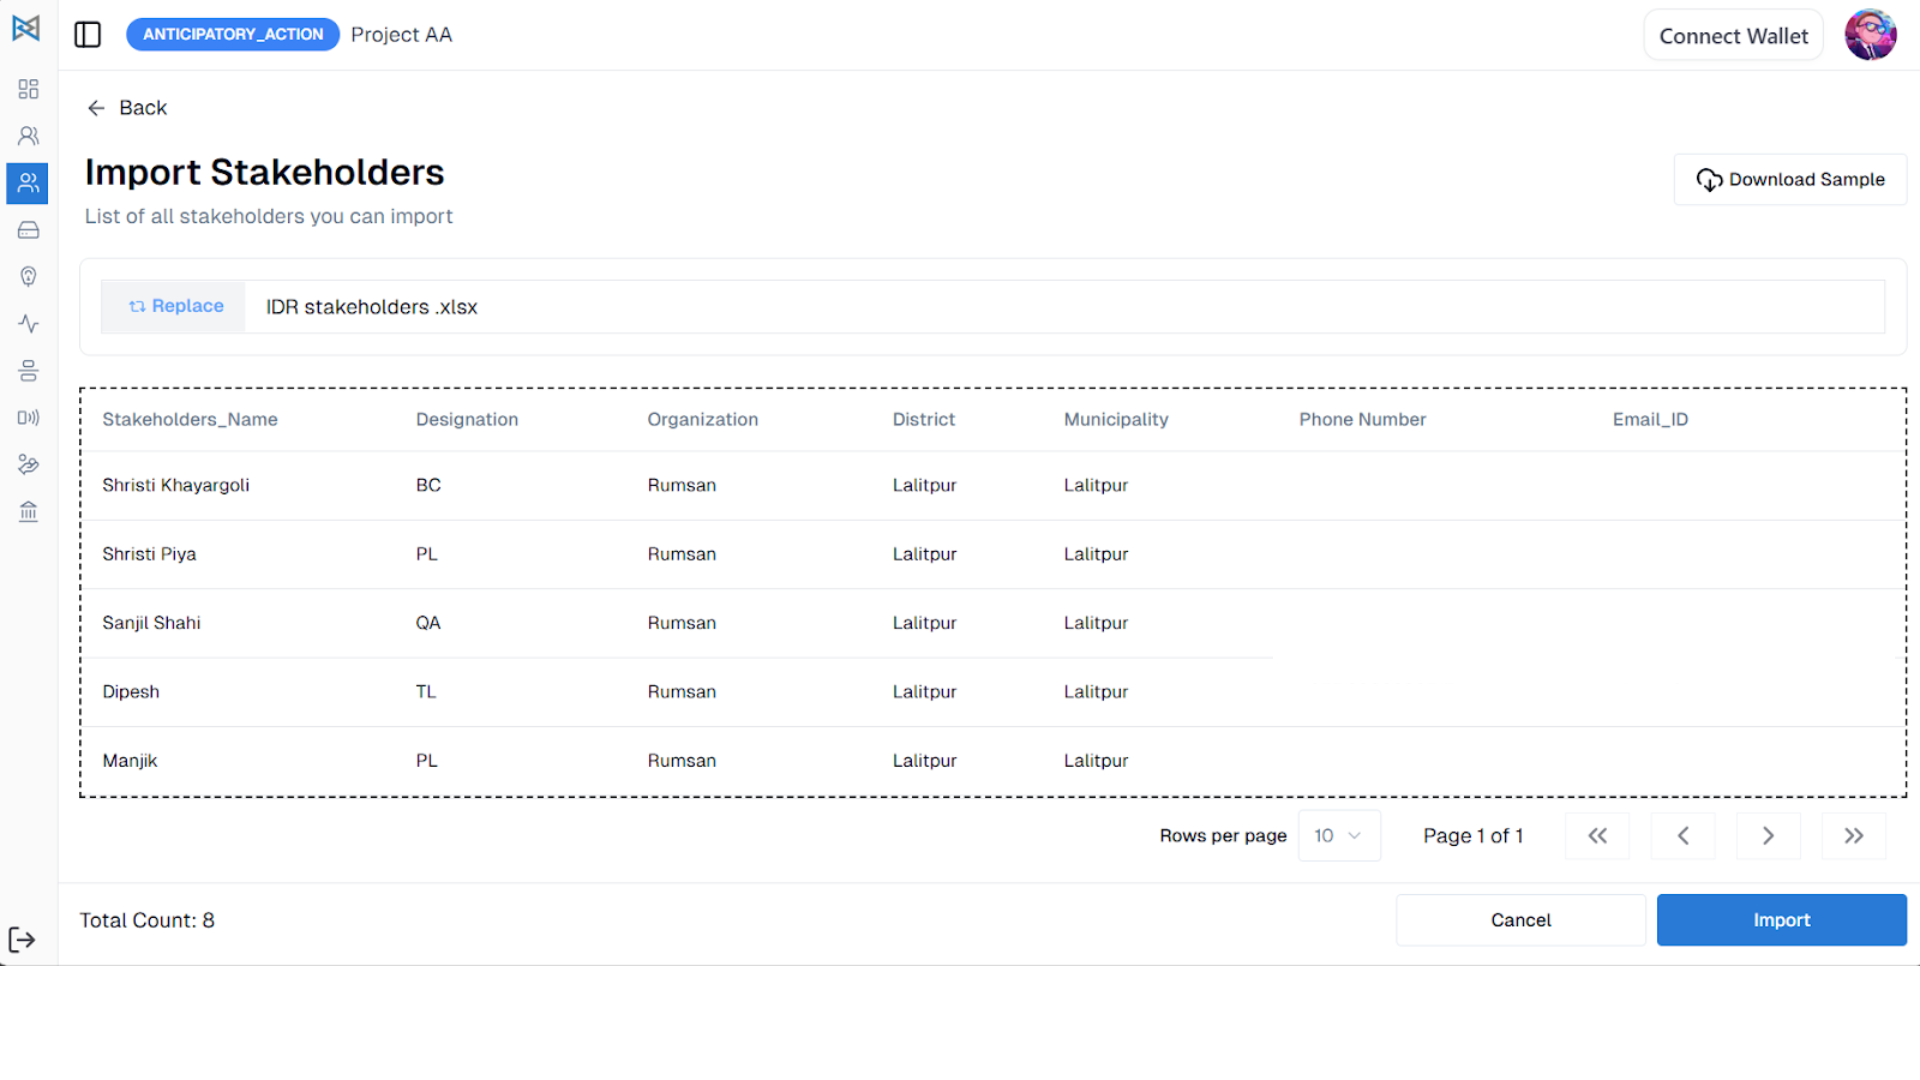
You can view a list of stakeholders and stakeholder groups within the Stakeholders section. To add stakeholders, click the Add Stakeholders button. If you prefer to import stakeholders in bulk, click the Import Stakeholders button. You can download the provided Excel template, fill in the required stakeholder details, and re-upload the file to add them to the system.
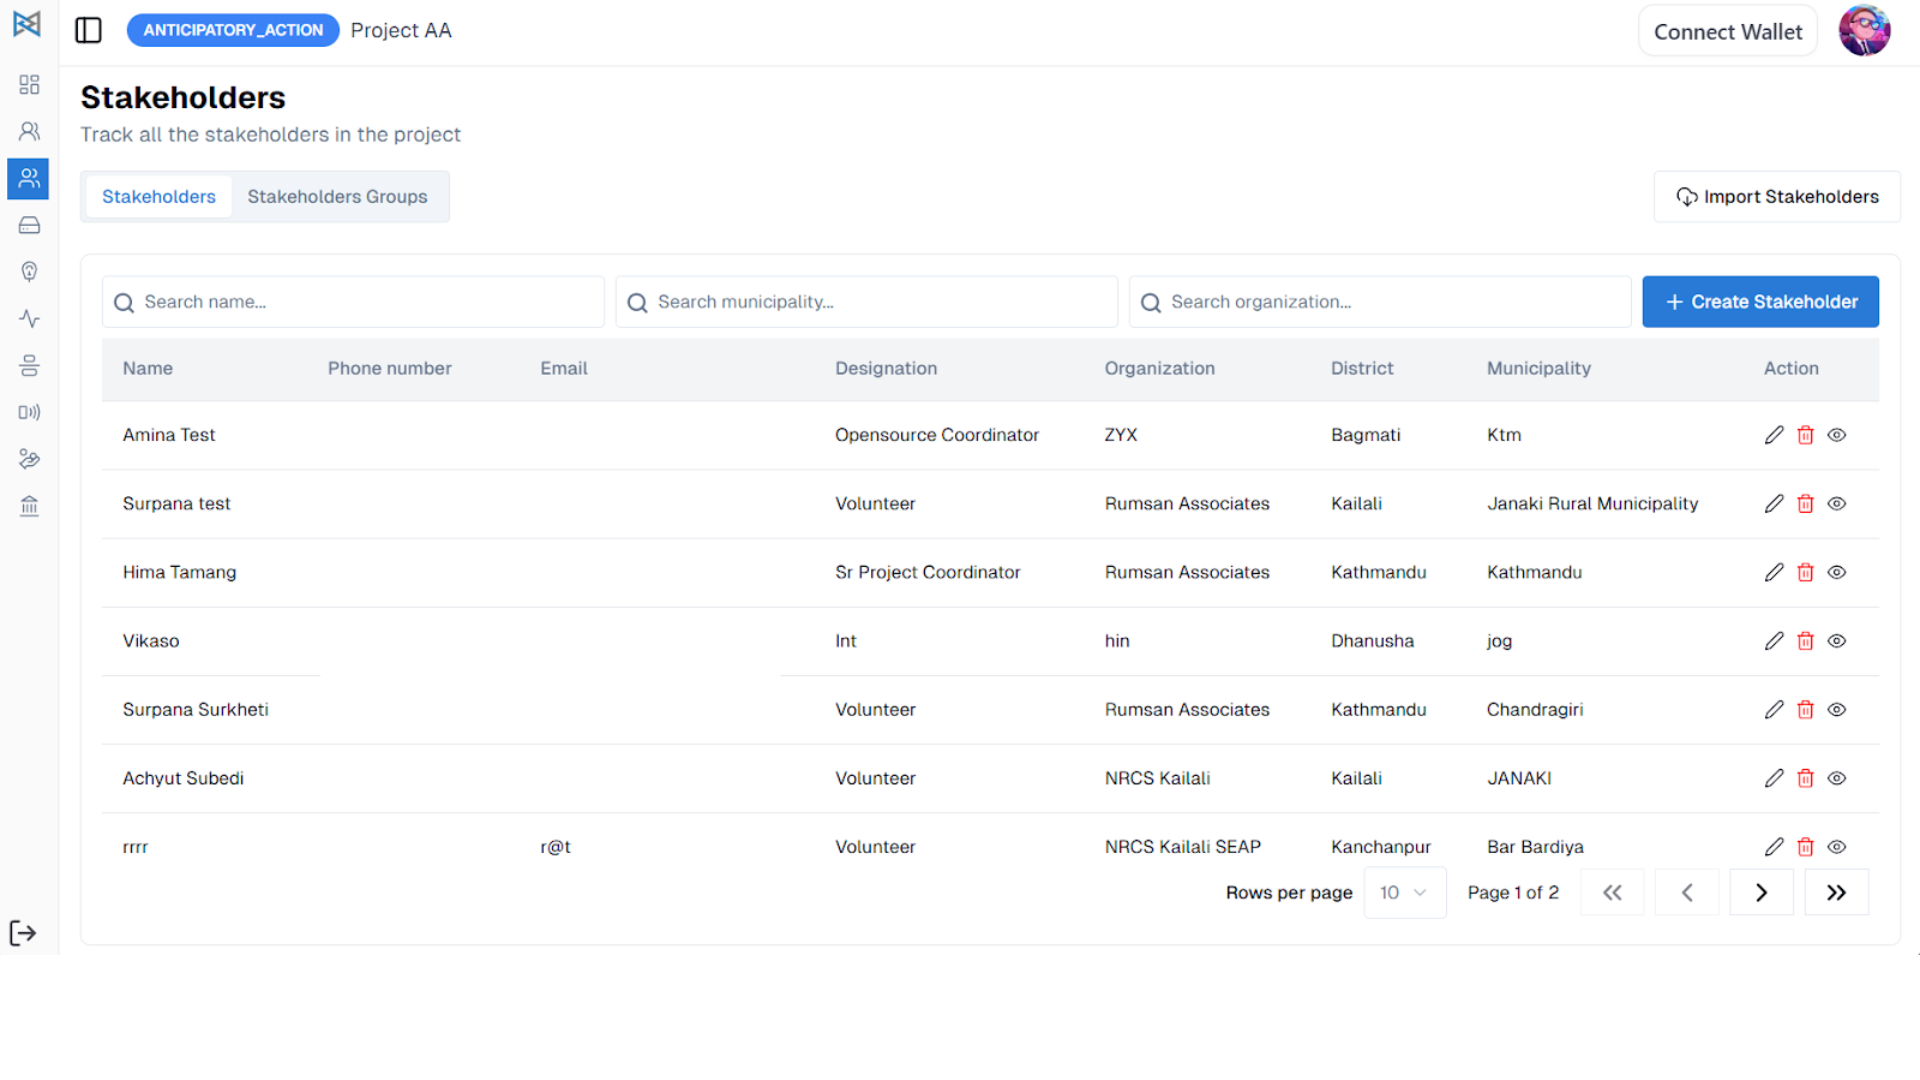
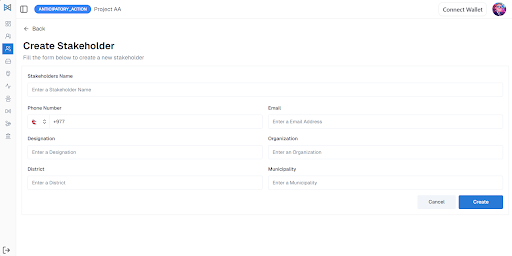
Alternatively, you can add stakeholders individually by going to Create Stakeholder and filling in the necessary information. All added stakeholders will be visible in the Stakeholder List.
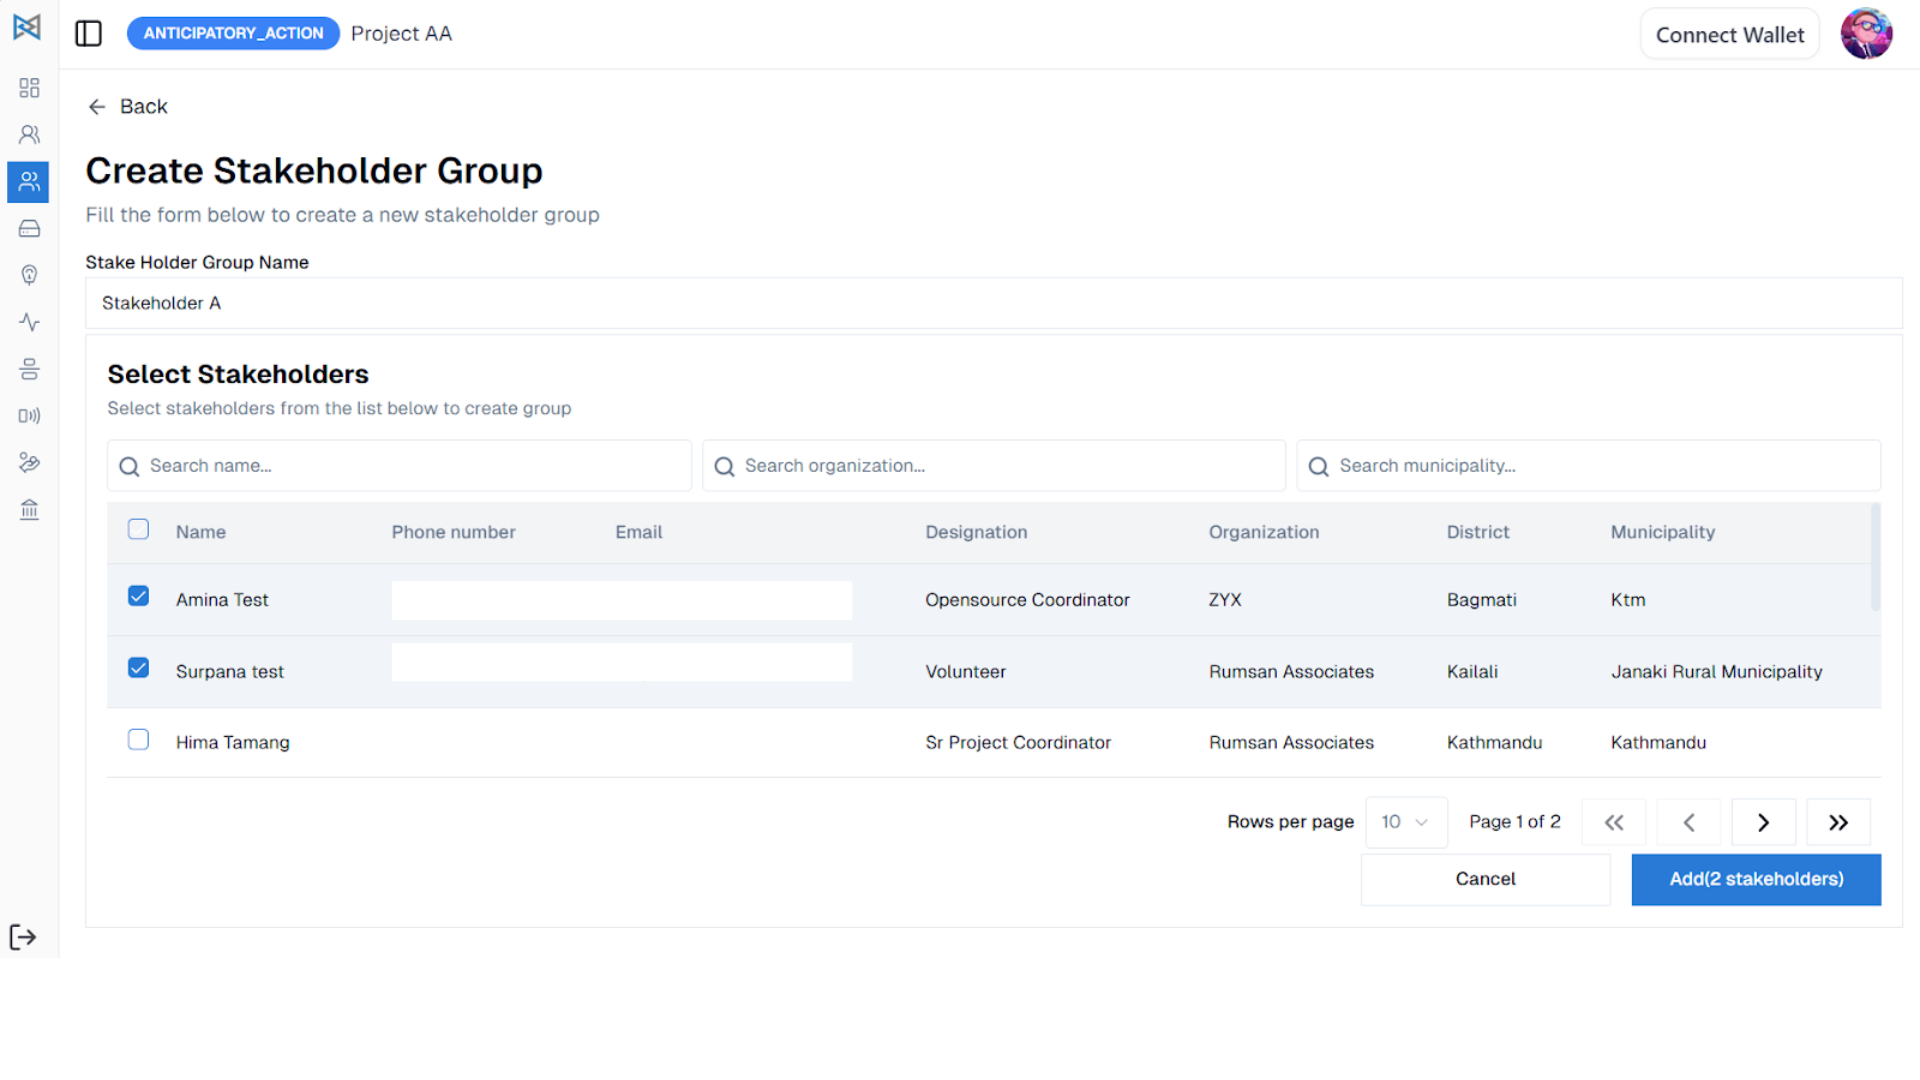
To create a stakeholder group, navigate to the Stakeholder Groups tab. Click on Create Stakeholder Group, enter a name for the group, and select the relevant stakeholders to include. Once created, the group will appear in the Stakeholder Group section for easy access and management.
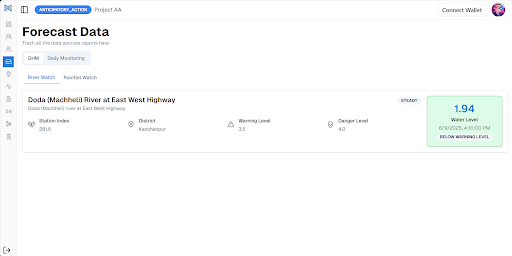
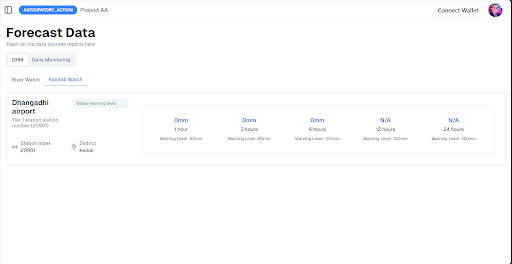
Forecast Data
To view forecast sources, go to the Forecast Data section. For DHM (Department of Hydrology and Meteorology), you can monitor two types of forecasts: River Watch and Rainfall Watch. You can view River Watch data in detail by clicking on the corresponding card.
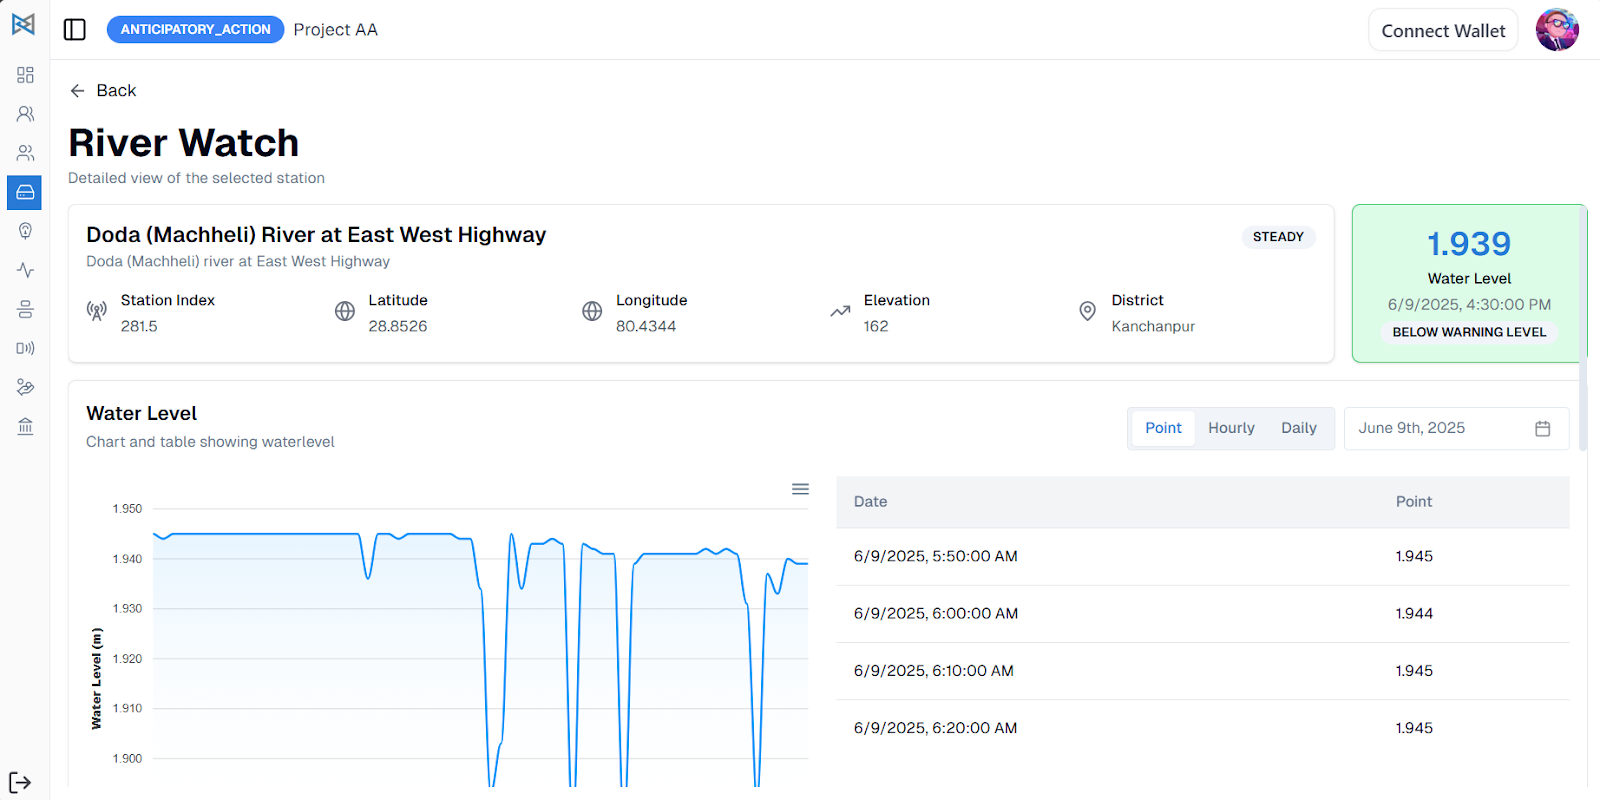
To manually add different data sources, navigate to the Daily Monitoring section and click the Add button. From there, you can select the relevant river basin and forecast source you are observing. Multiple data sources can be added in this section. Once all entries are filled, click Add to save the data inputs.
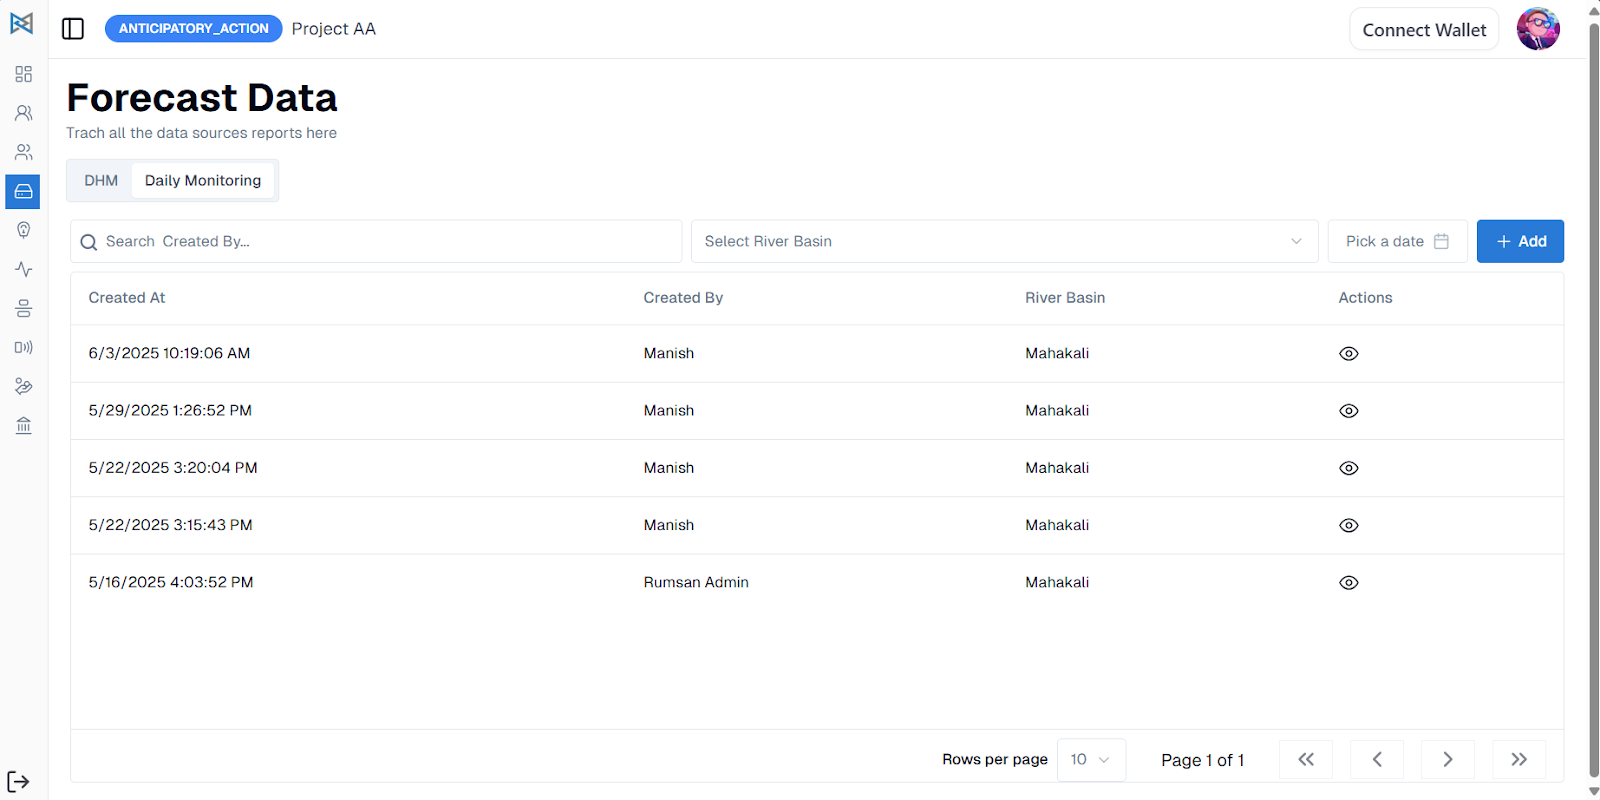

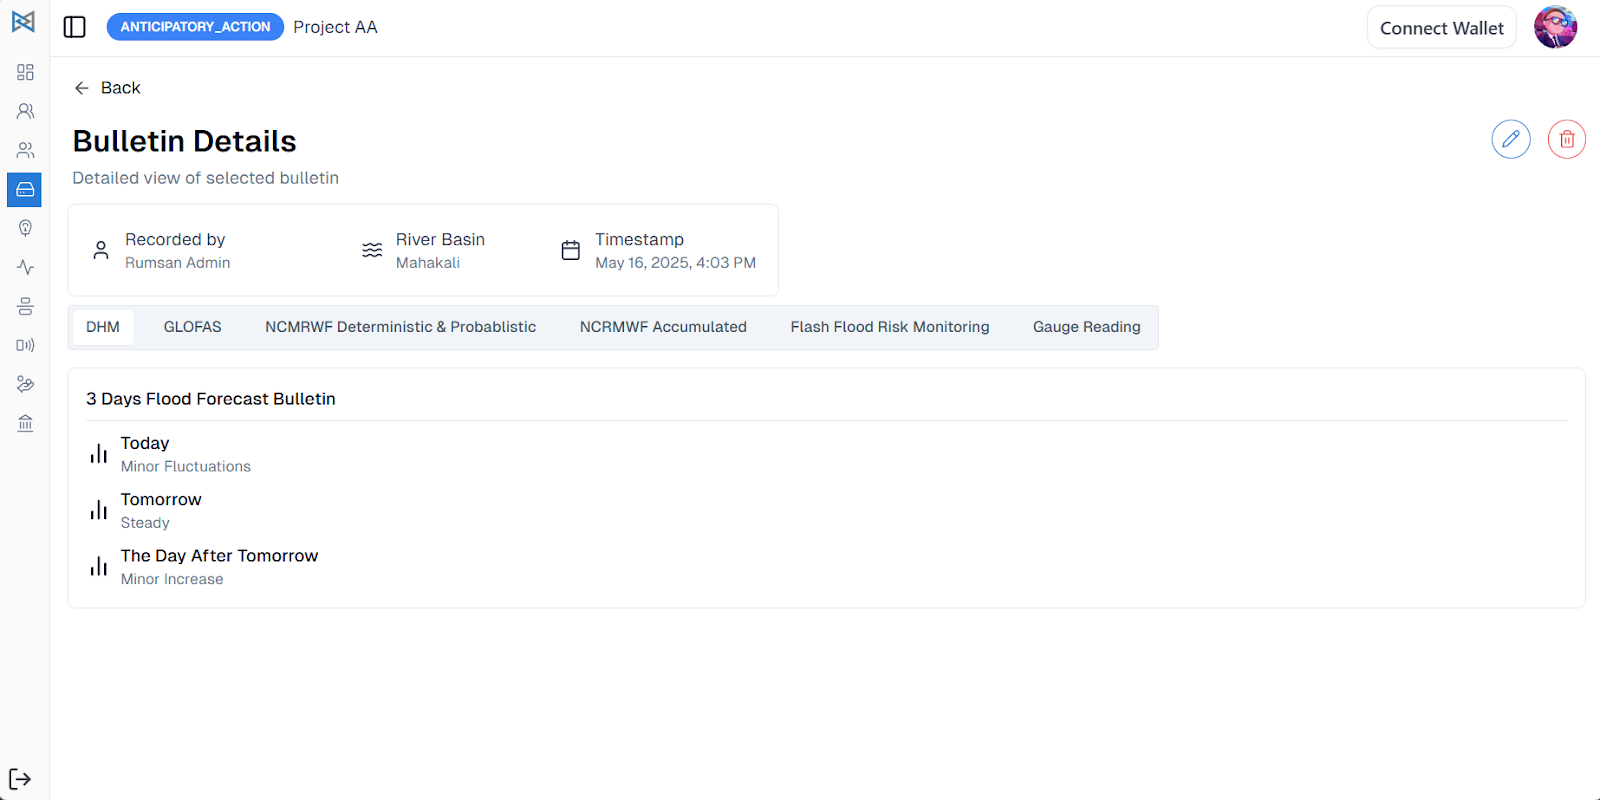
After saving, you can view a list of Daily Monitoring entries organized by the recorded date. You can also access detailed pages for each data source to review specific information.
Trigger Statements
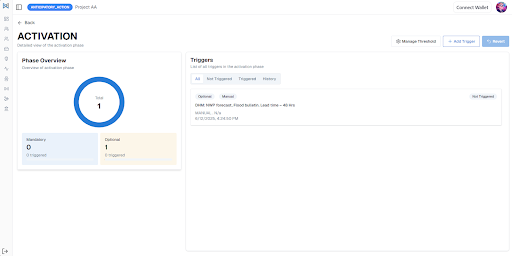
To add triggers for both the Readiness and Activation phases, go to the Trigger Statements section. You can also view detailed reports of triggers for each phase. Additionally, the Trigger Statement Dashboard displays a list of recent triggers for quick reference.
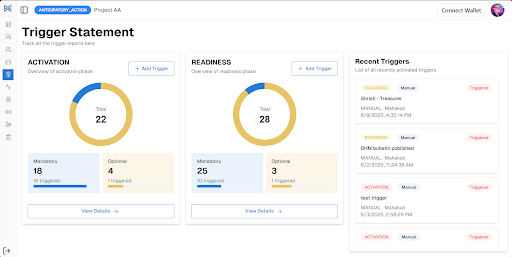
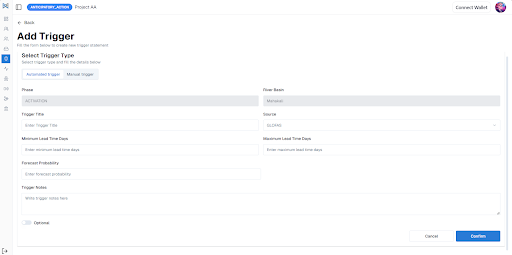
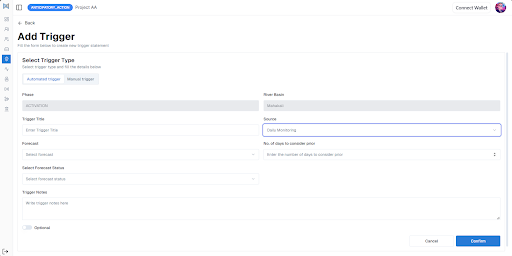
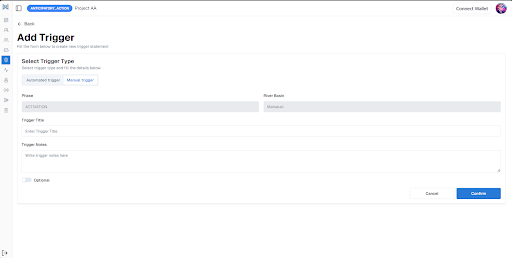
Click on the Add Trigger button to add trigger statements to the respective phases. You can add two types of Trigger Statements: Automated and Manual.
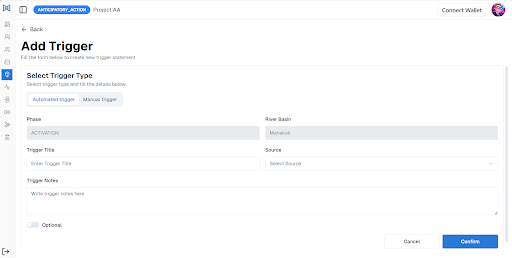
In the Automated Triggers, you can select different data sources such as GLOFAS, DHM, and Daily Monitoring.
For the Manual Trigger Statements, you can add the Title of the trigger and the Details of the trigger.
You can select Optional to choose if the trigger statement is optional. Likewise, you can configure trigger statements in Manage Threshold. Once you click on Confirm, you can either Save or Add Another Trigger.
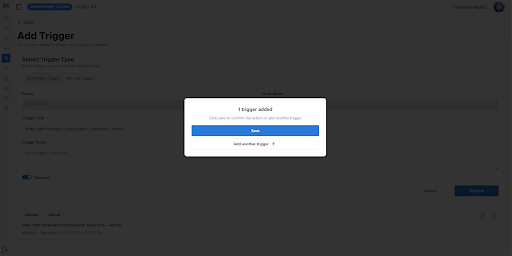
If you save the trigger statements, you can view them in the Phase Detail page.
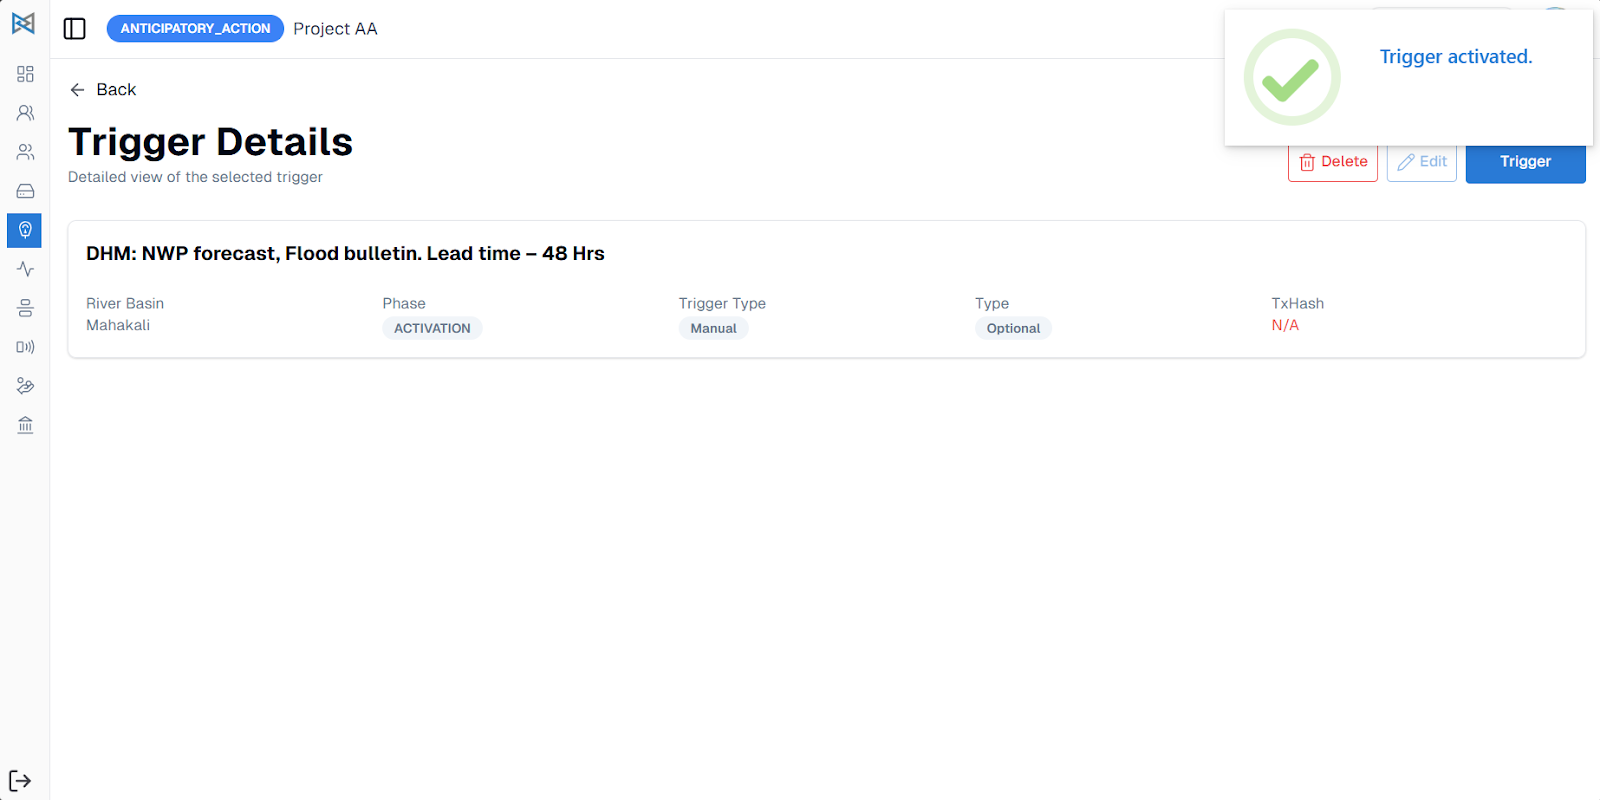
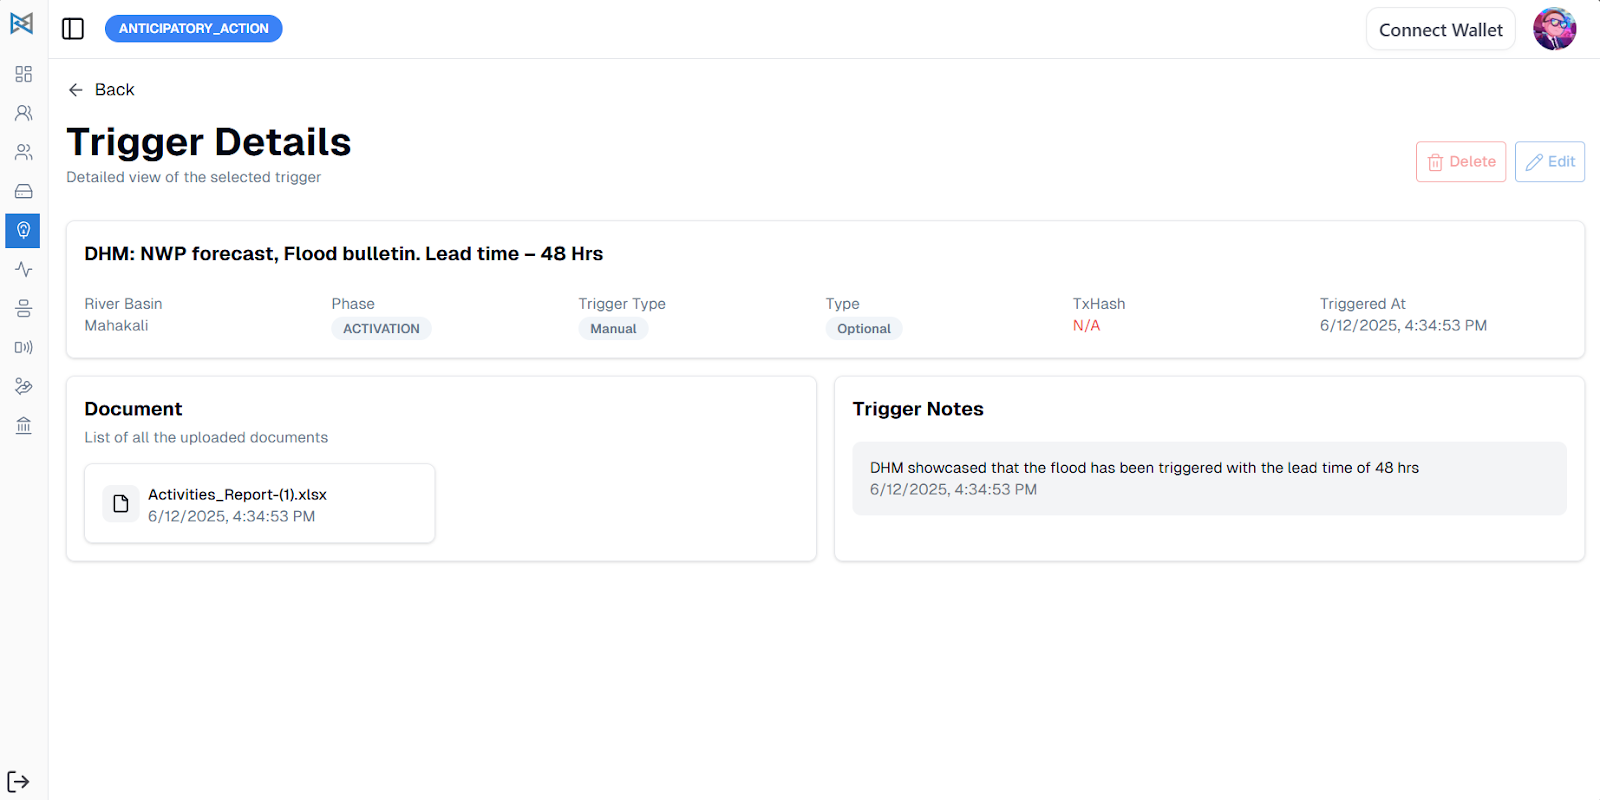
In case of an Automated Trigger, the triggers will be activated automatically. Likewise, for Manual Trigger Statements, you can select the trigger statement and view the Detail Page.
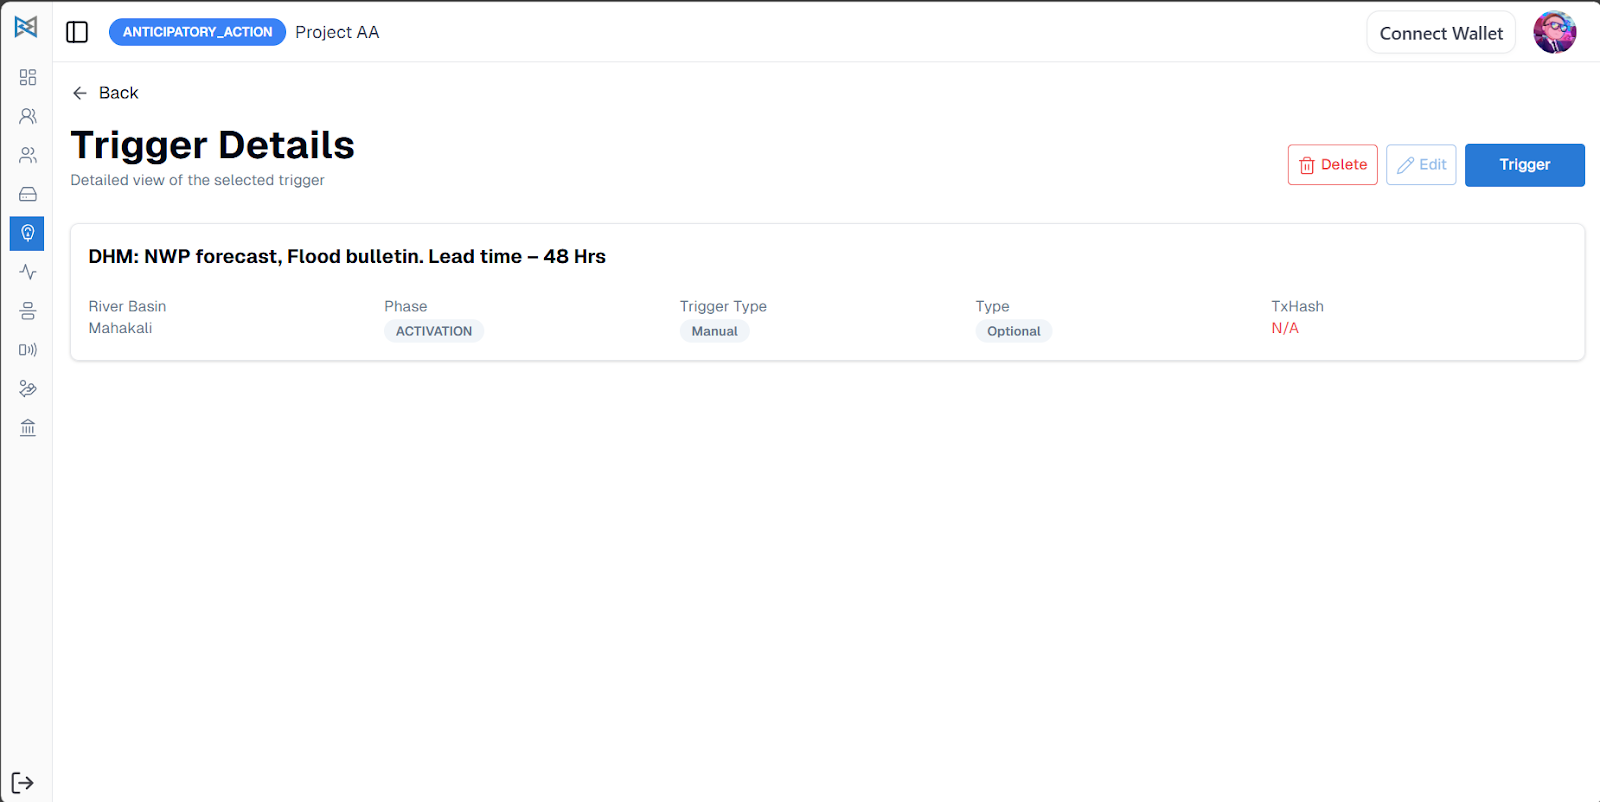
Click on the Trigger button to activate the trigger statements. You can add Notes and upload Proof Documents. Later, the notes and documents will be visible in the Trigger Detail Page.

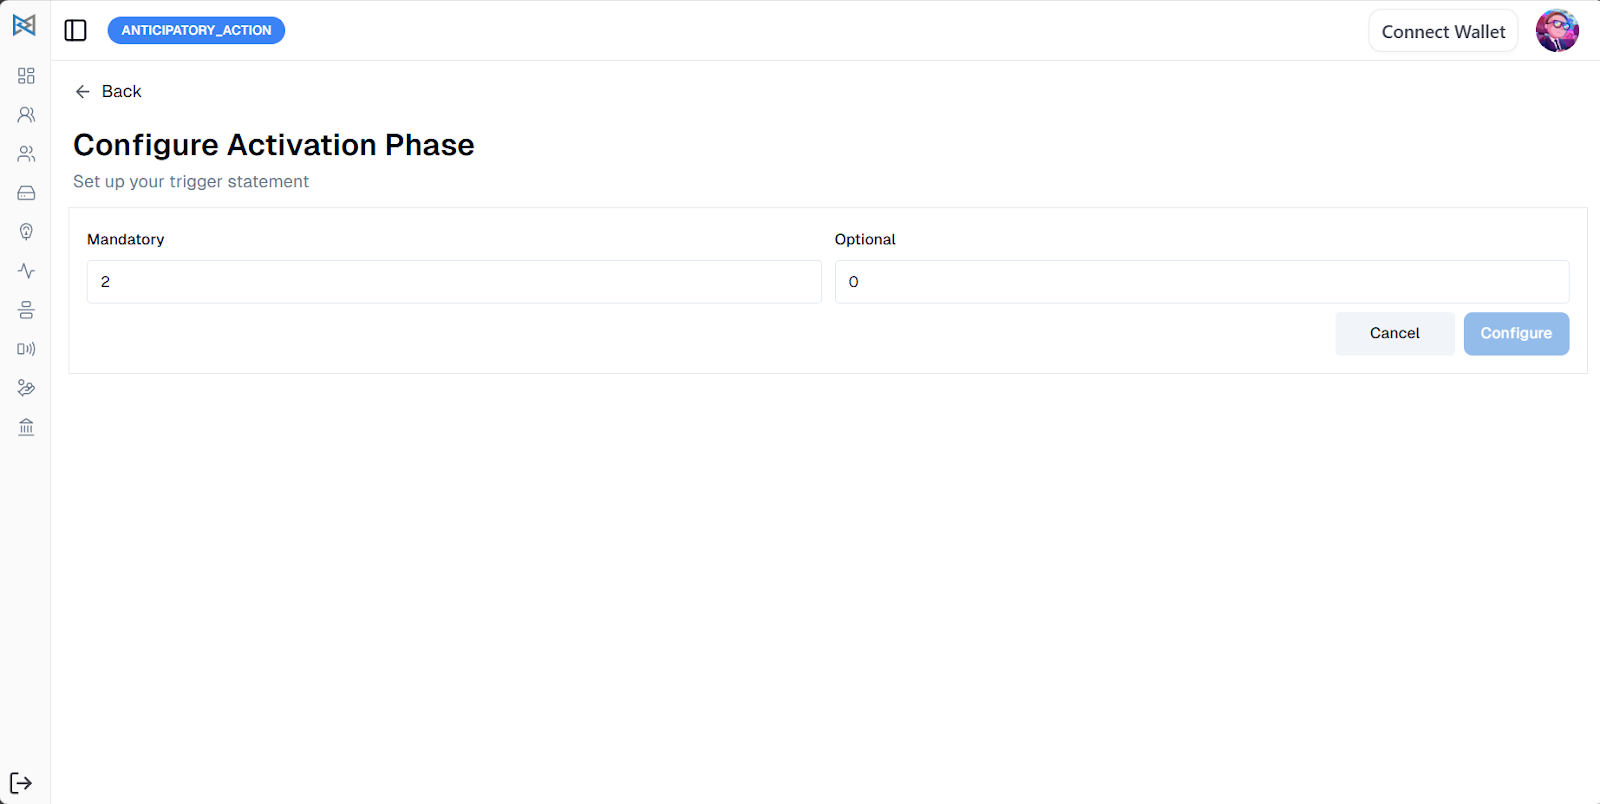
Manage Threshold
To manage the threshold, go to the Phase detail page in trigger statements and click on Manage Threshold.
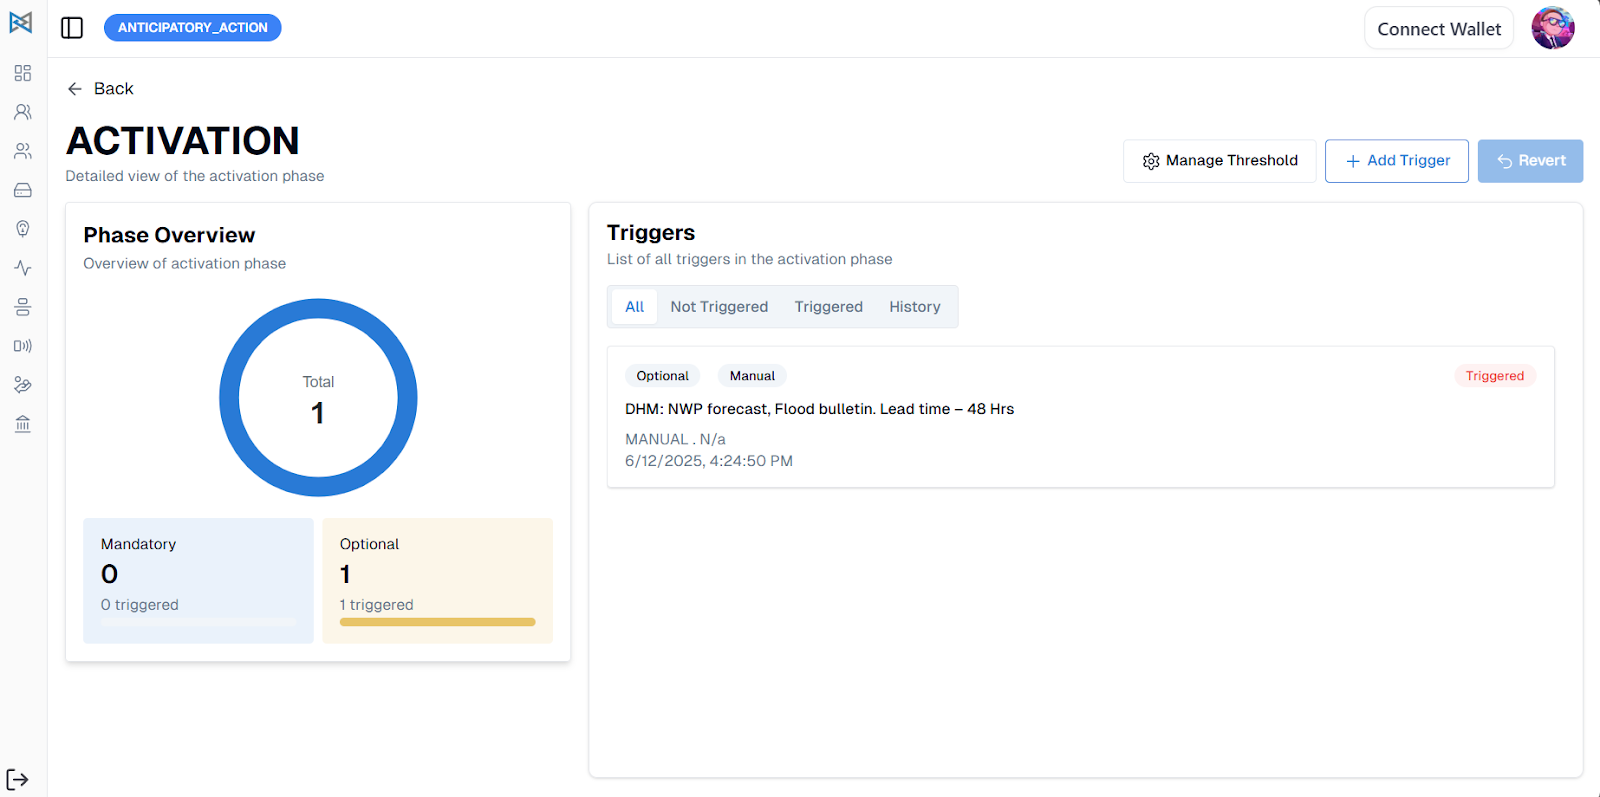
You can add the numbers of Mandatory and Optional triggers and configure them. That means for the phase to be triggered, it will require x numbers of Mandatory trigger statements and x numbers of Optional trigger statements.
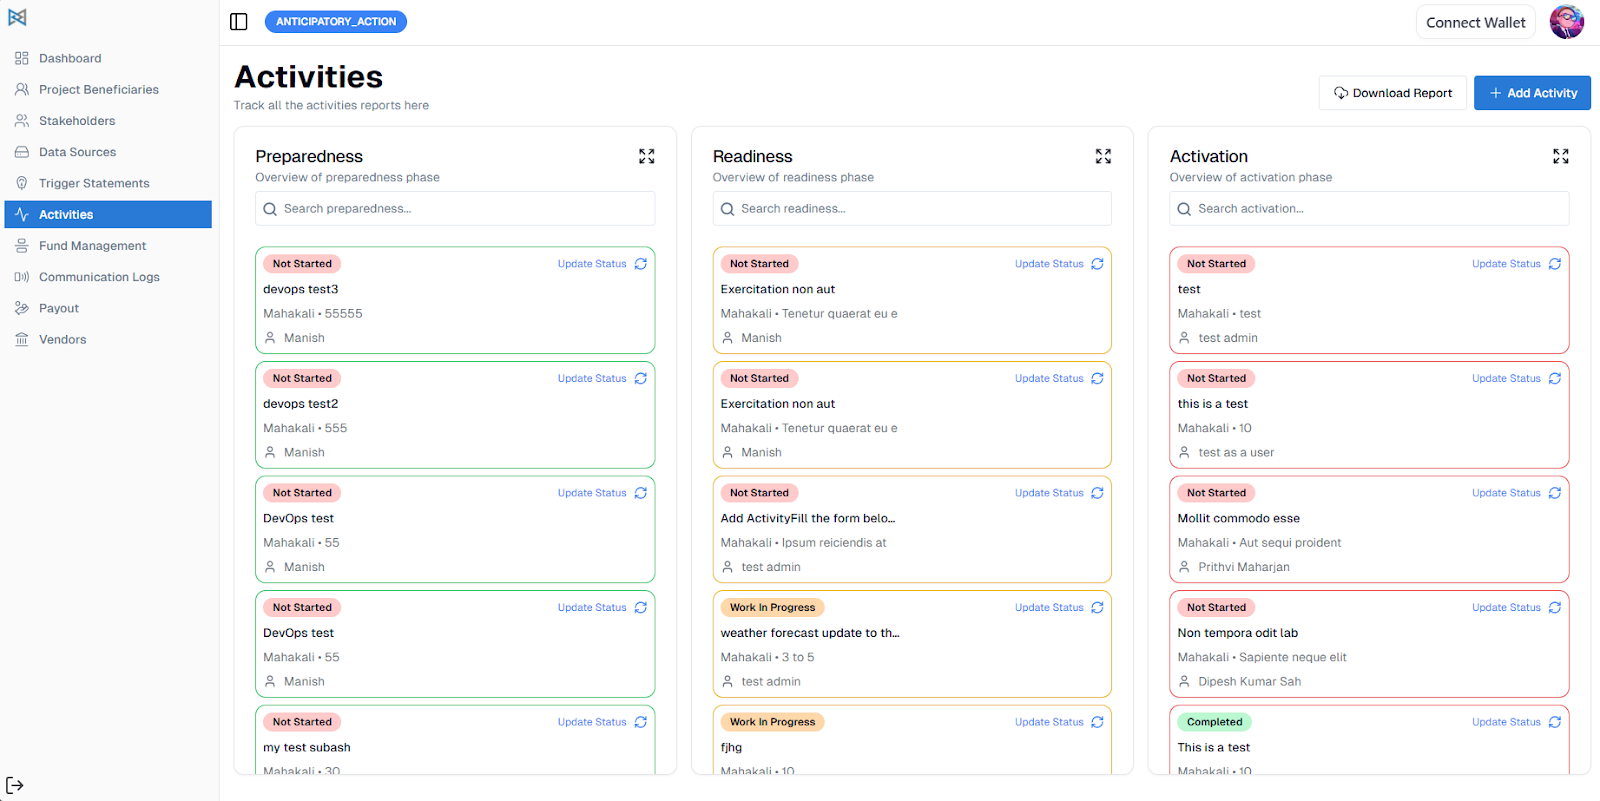
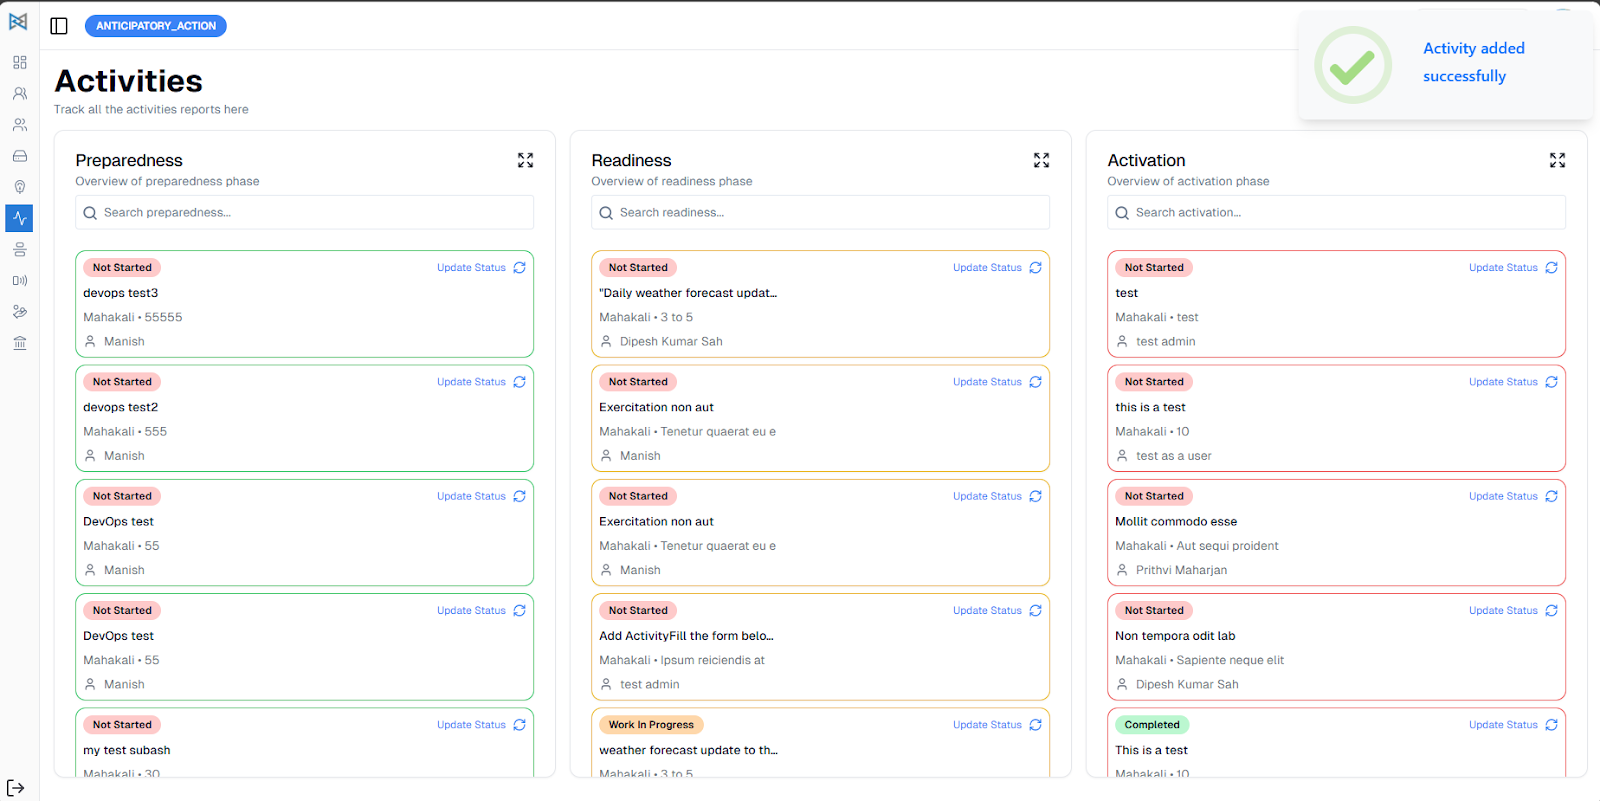
Activities
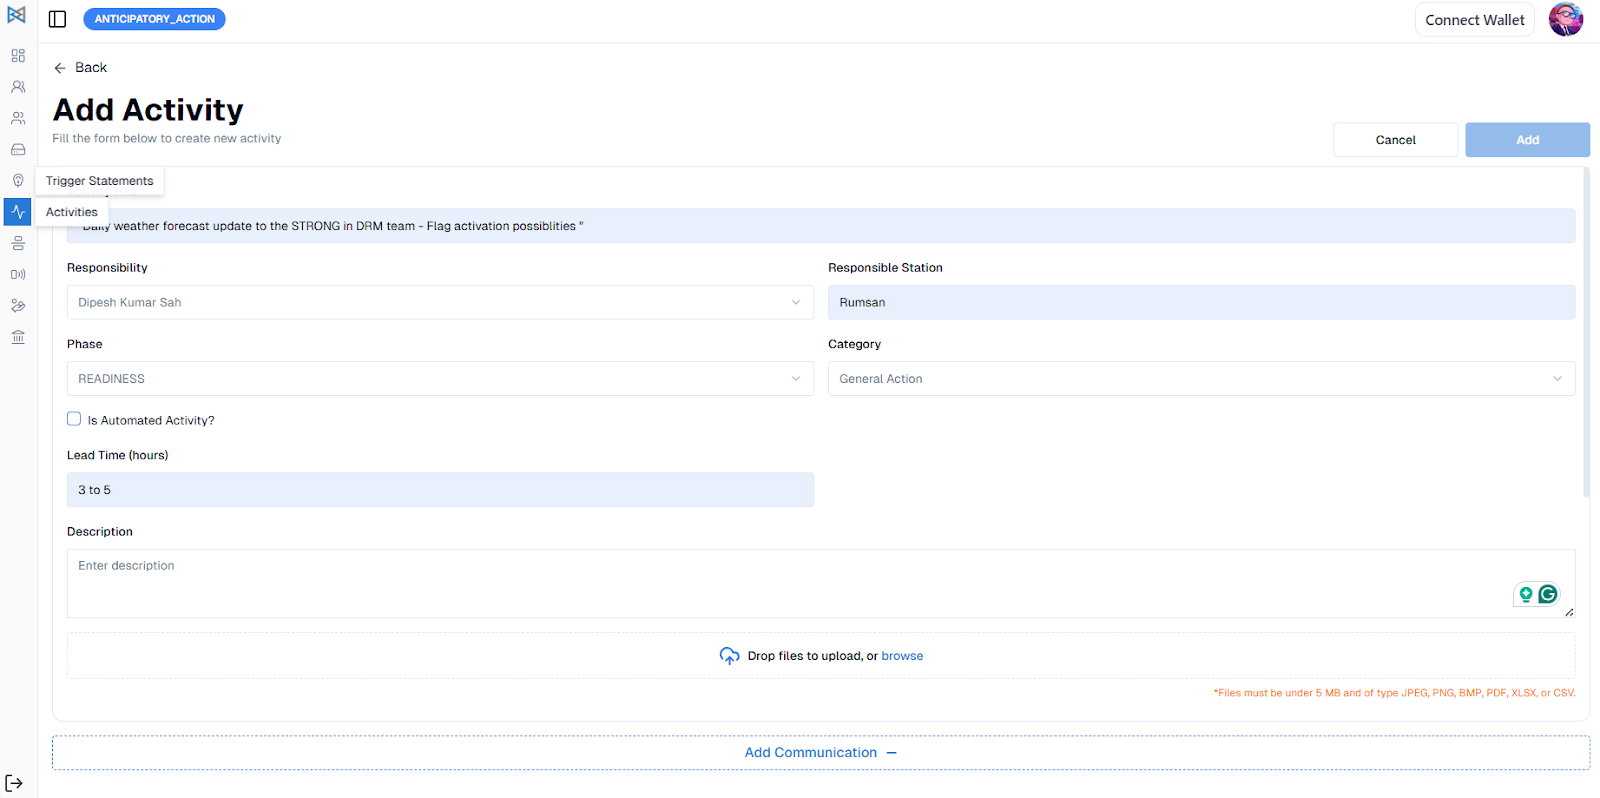
To manage activities, go to the Activities page. Here, you can add new activities and view existing ones categorized under the three phases: Preparedness, Readiness, and Activation. Each phase can be expanded to reveal a list of the activities associated with it.

To add a new trigger-based activity, click on Add Activity and complete the form. If you want the activity to be automatically triggered during the Readiness or Activation phases, check the “Automate Activity?” box. Enabling this option ensures that the activity is completed automatically when the relevant phase is activated, and any linked communications are sent automatically.
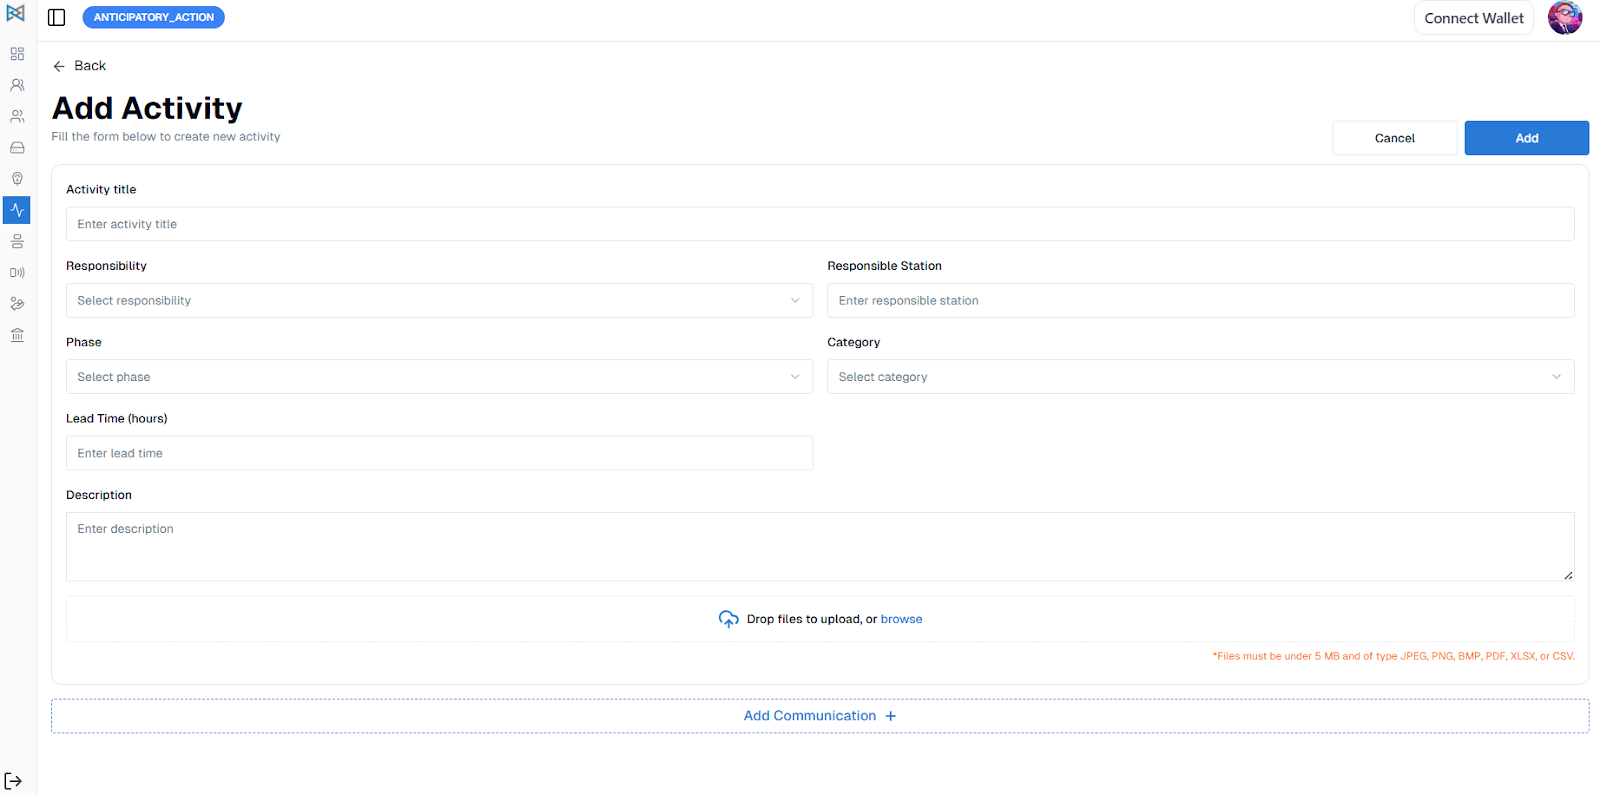
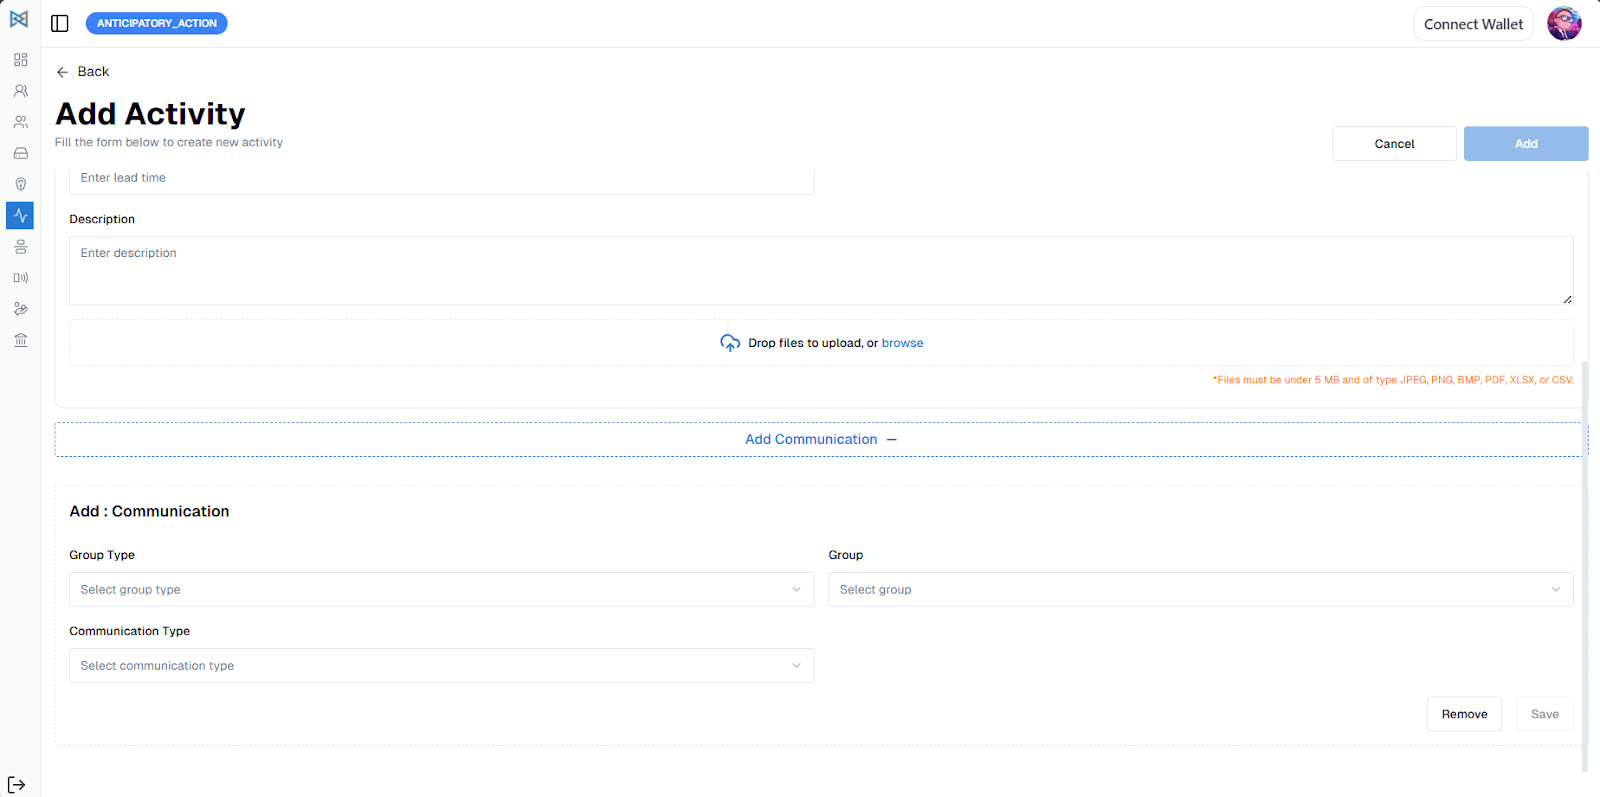
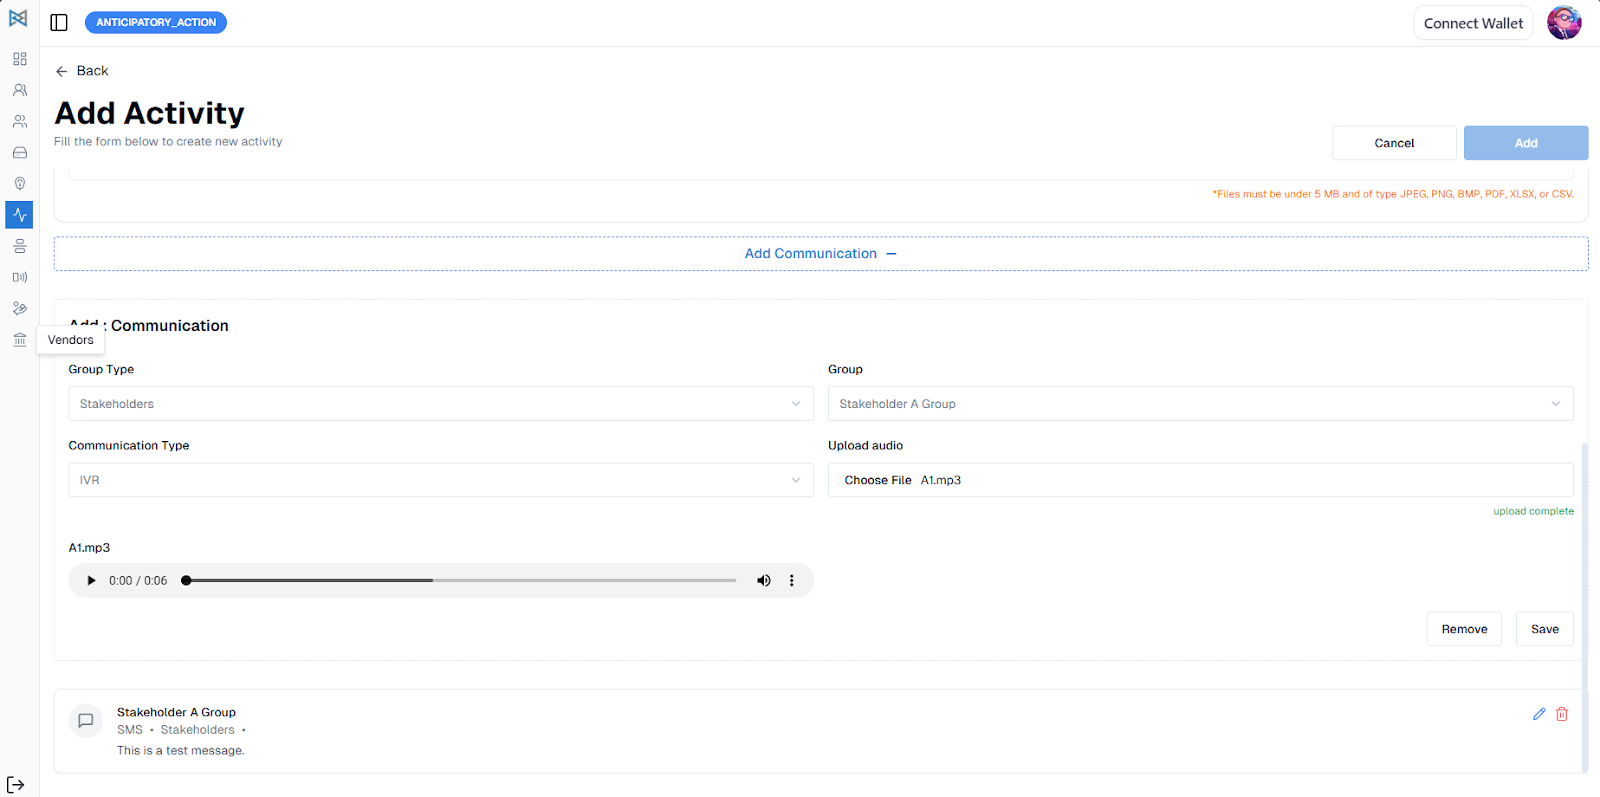
You can also add communications to an activity by clicking on the Add Communication button. In the communication form, you'll be required to select a Communication Type and a Group Type, which can be either Stakeholder or Beneficiary. The list of groups already assigned to the project will appear for selection. Depending on the communication type, you can upload or enter messages accordingly—for example, text for SMS or an MP3 file for a Voice Message. Multiple communications can be added, and a preview of them will appear below the form.
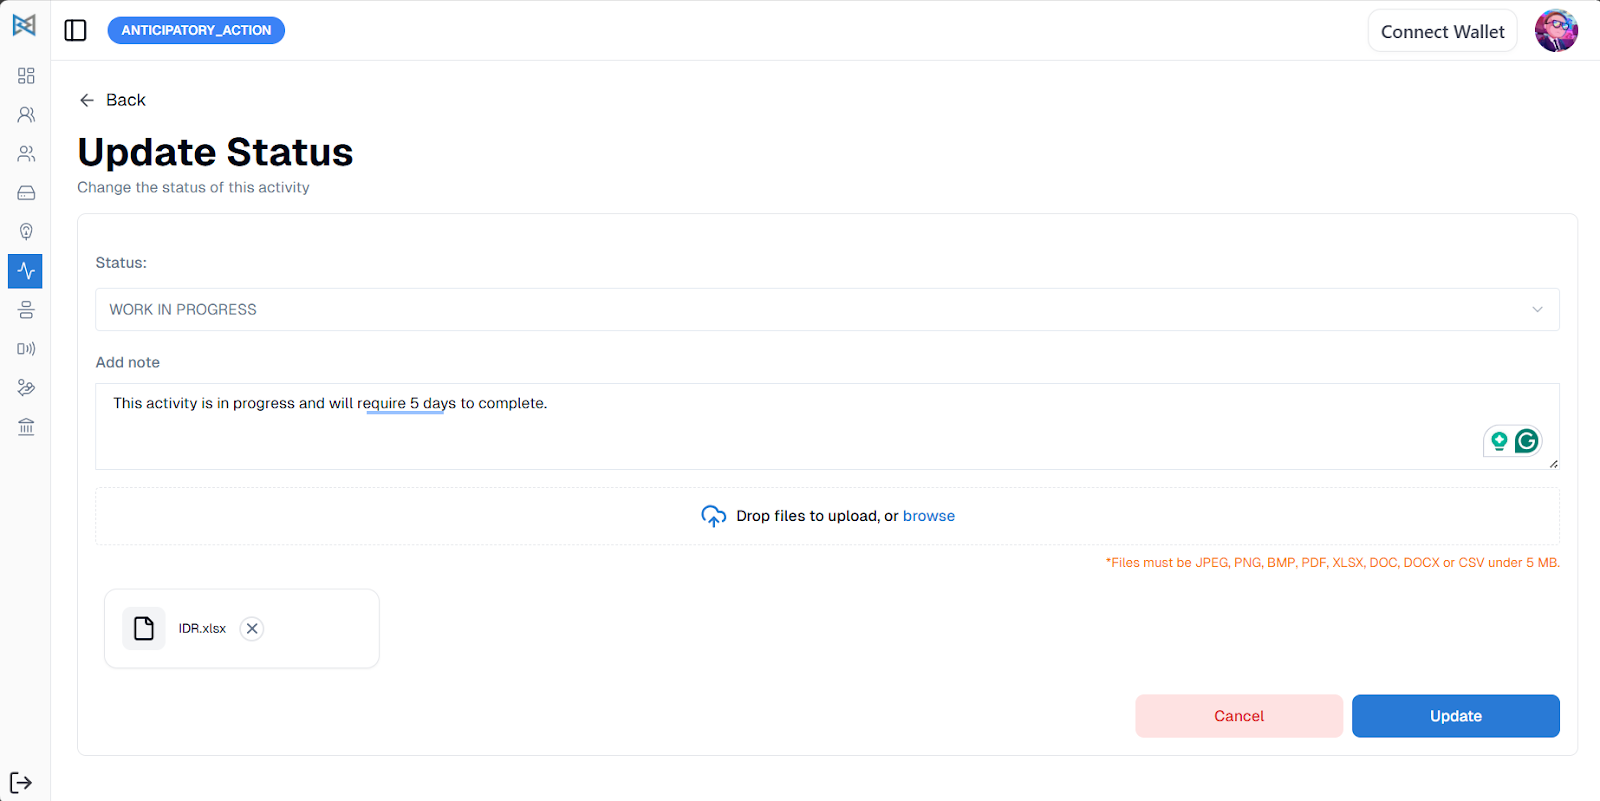
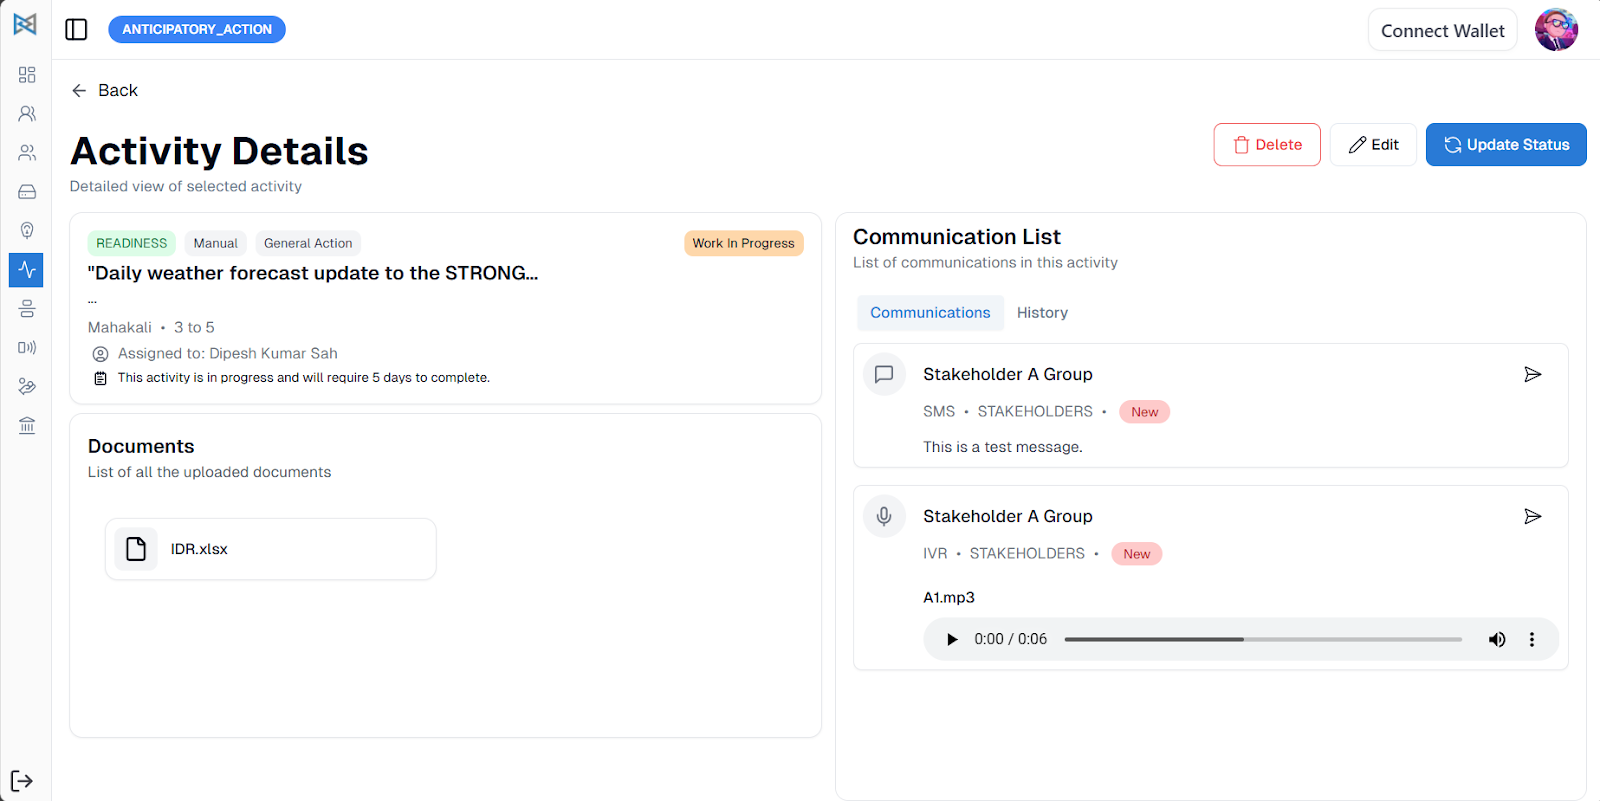
Once the activity is created, it will appear under the phase section you selected during its creation. To update the status of an activity, you can click on Update Status or navigate to the activity’s Detail Page by clicking on the activity card. While updating the status, you can also upload relevant documents and add notes, which will later be visible on the detail page.
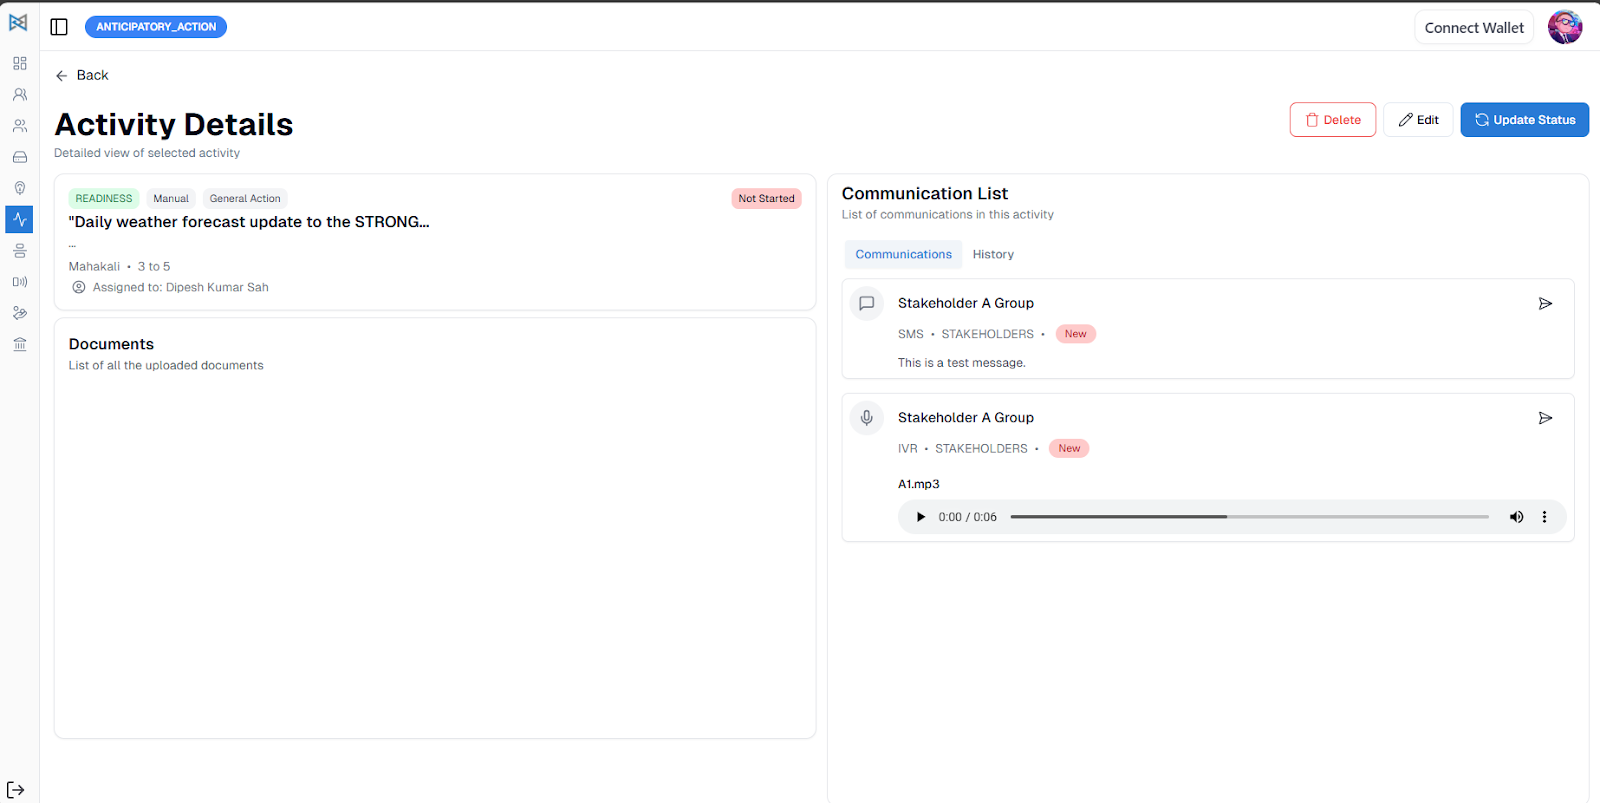
If needed, communications can also be sent manually by clicking the Send button. For more information about the communications, you can visit the Communication Log.
Communication Log
To access the communication log, click on Communication Log in the navigation bar. This section provides a summary report of all Voice Messages and SMS that have been sent. Along with the report, you can also view a list of activities that have associated communications.
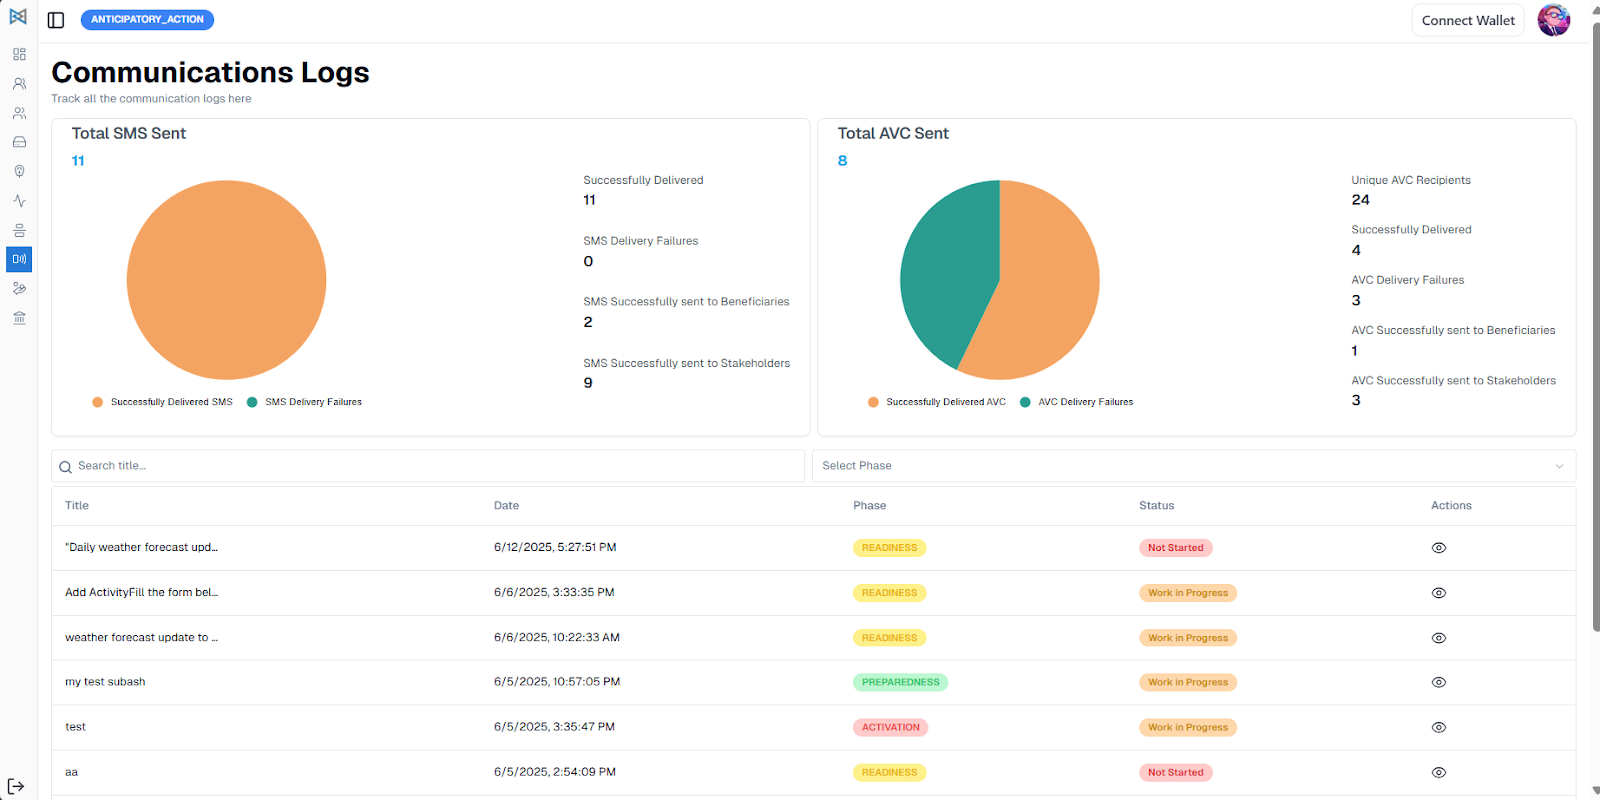
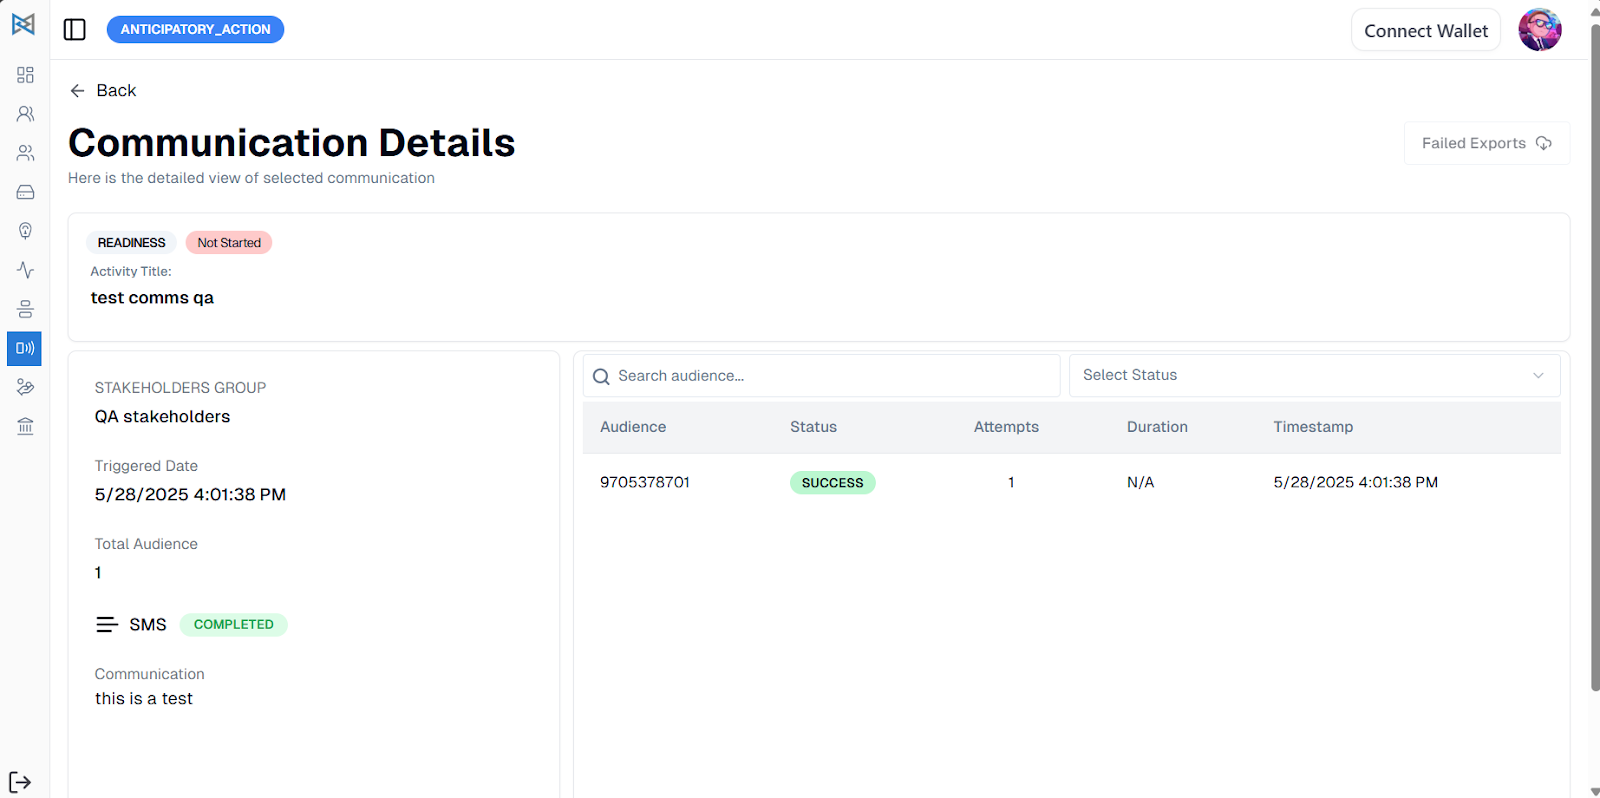
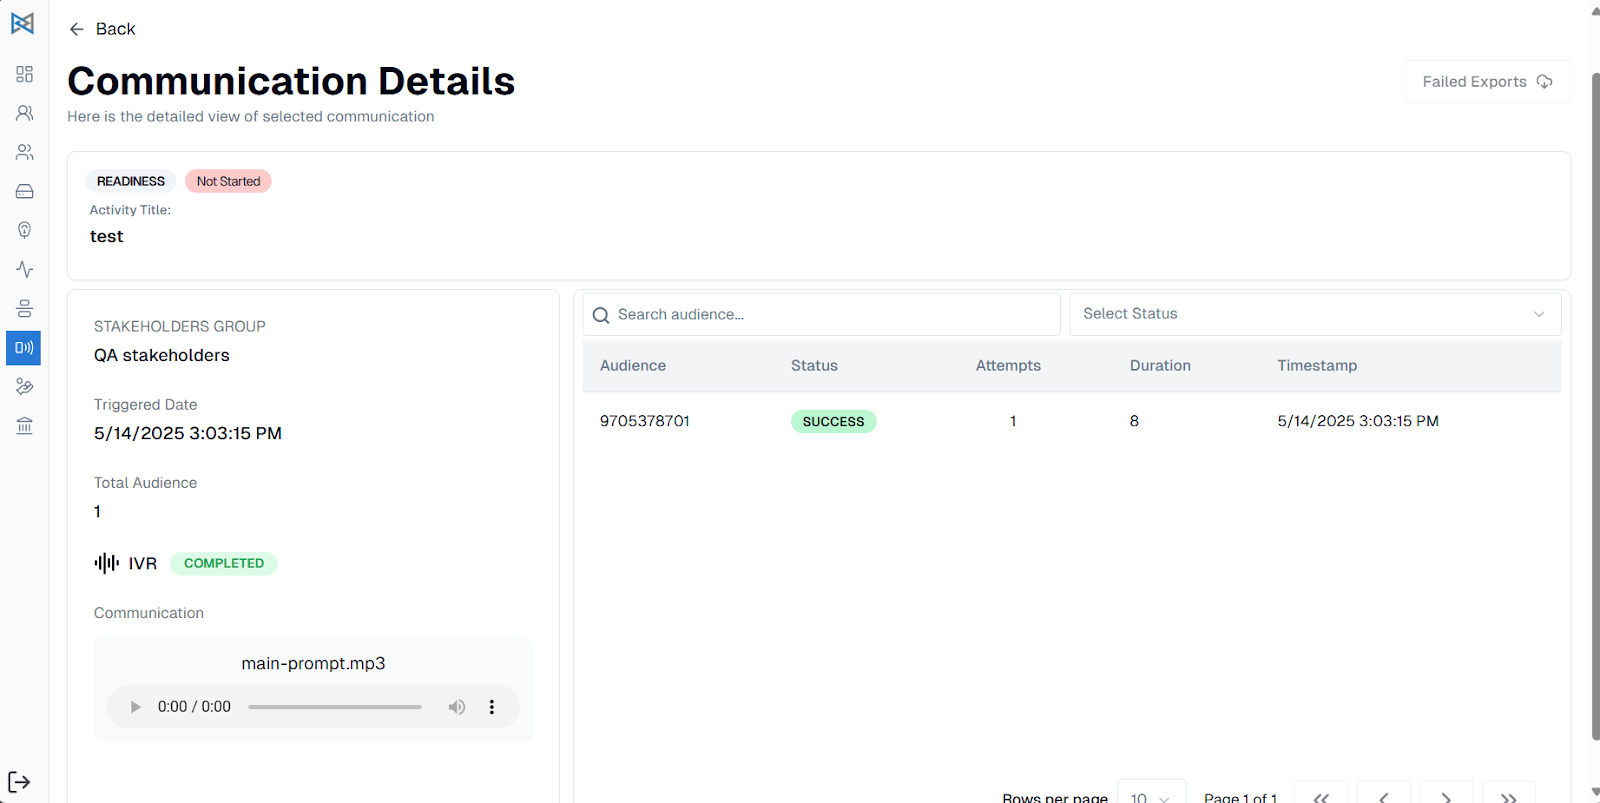
To explore the details of a specific activity, click on the View icon next to it. This will take you to the Communication Detail page, where you can see a grid displaying all communications related to that particular activity.
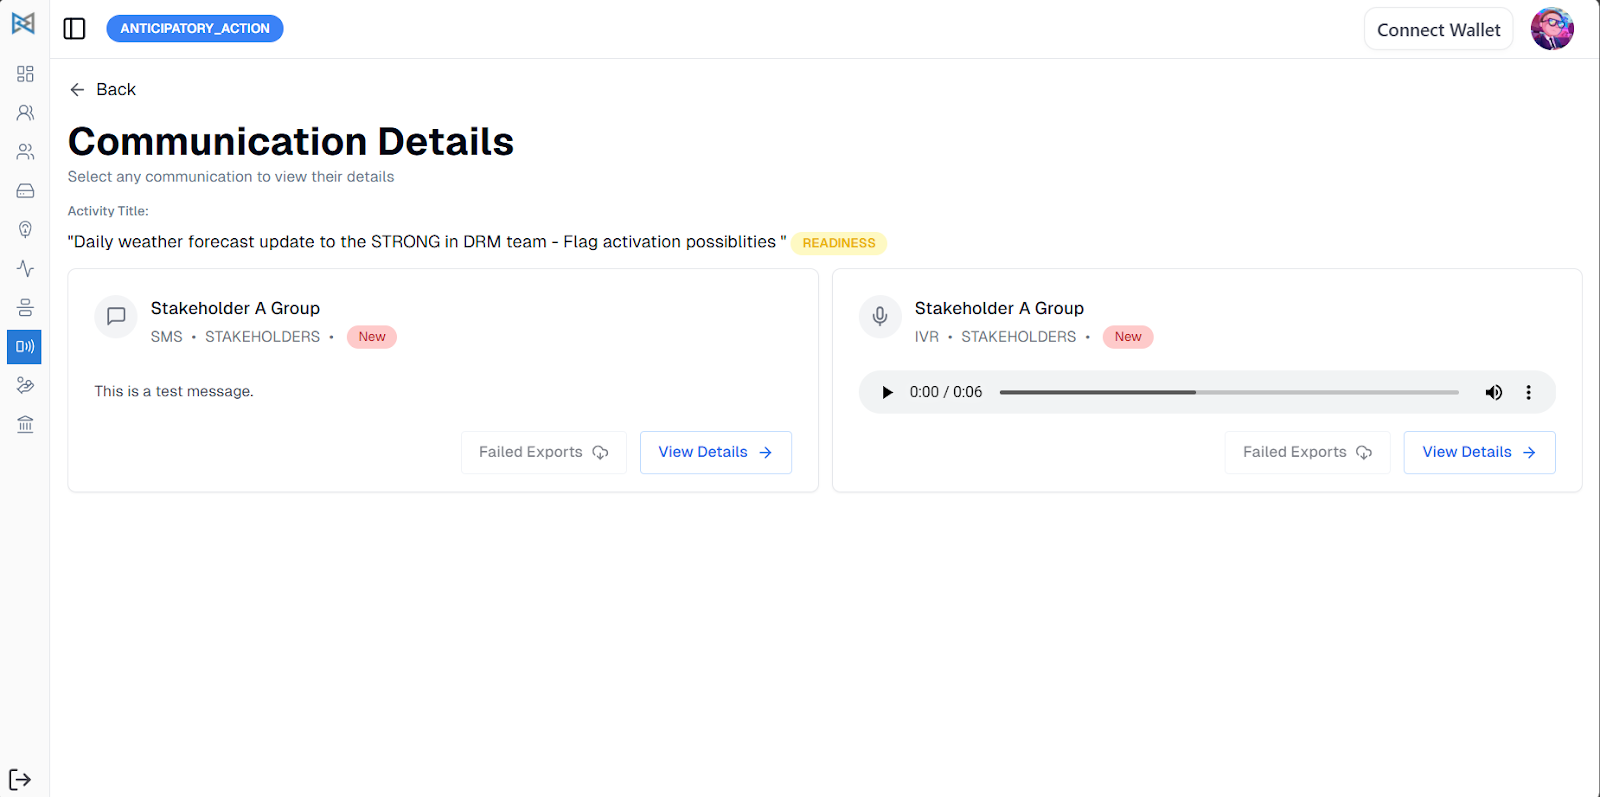
If you want to see more detailed information about a specific communication, click on View Details. If the communication has been completed, full details will be displayed. For communications that are marked as Failed, In Process, or Pending, you can find their status and information under the corresponding tabs.
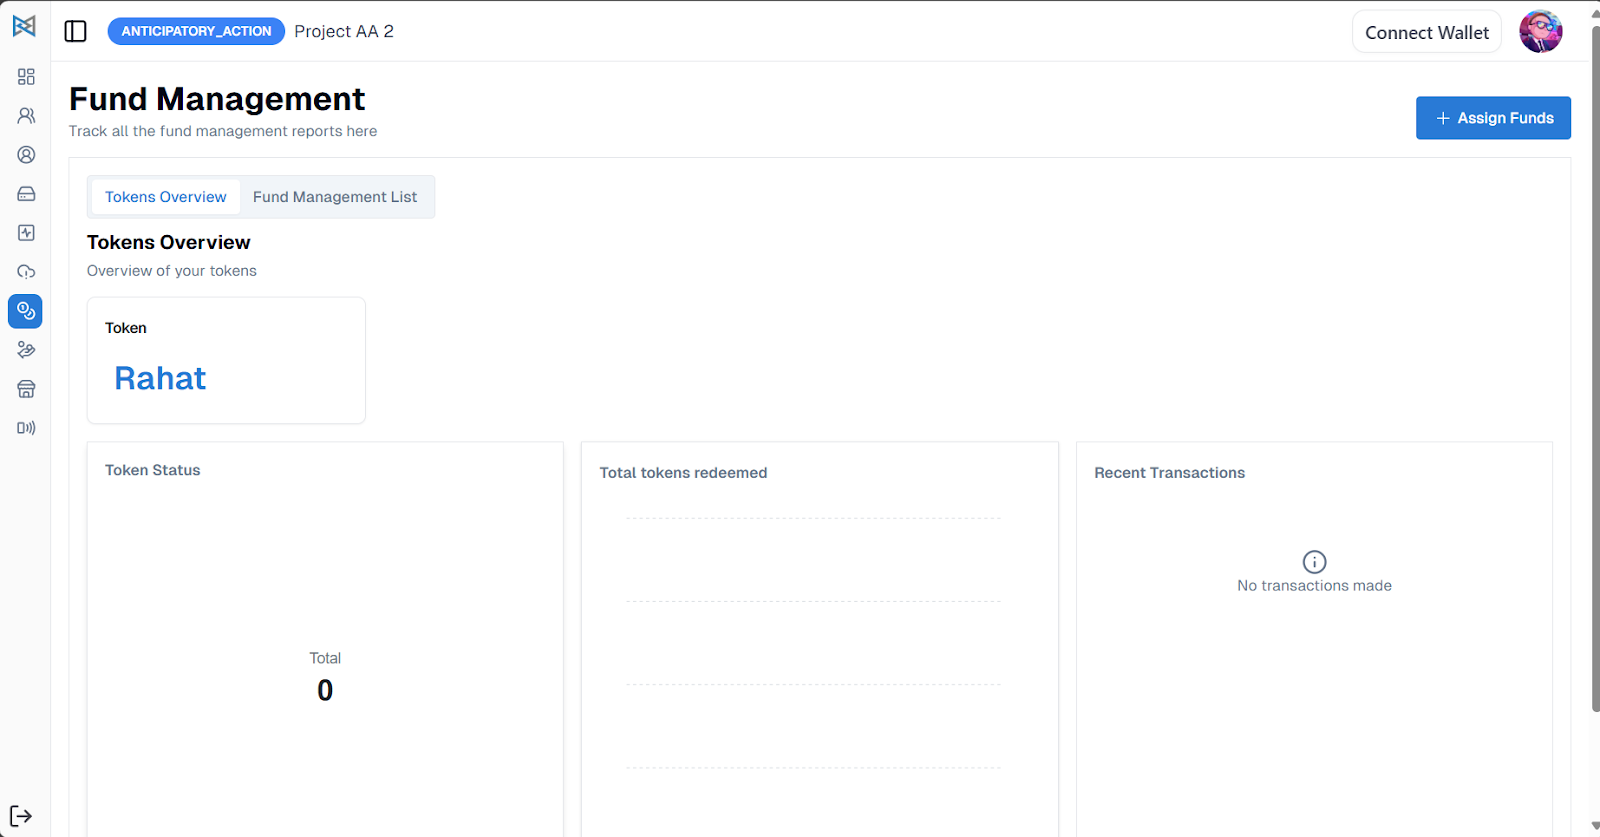
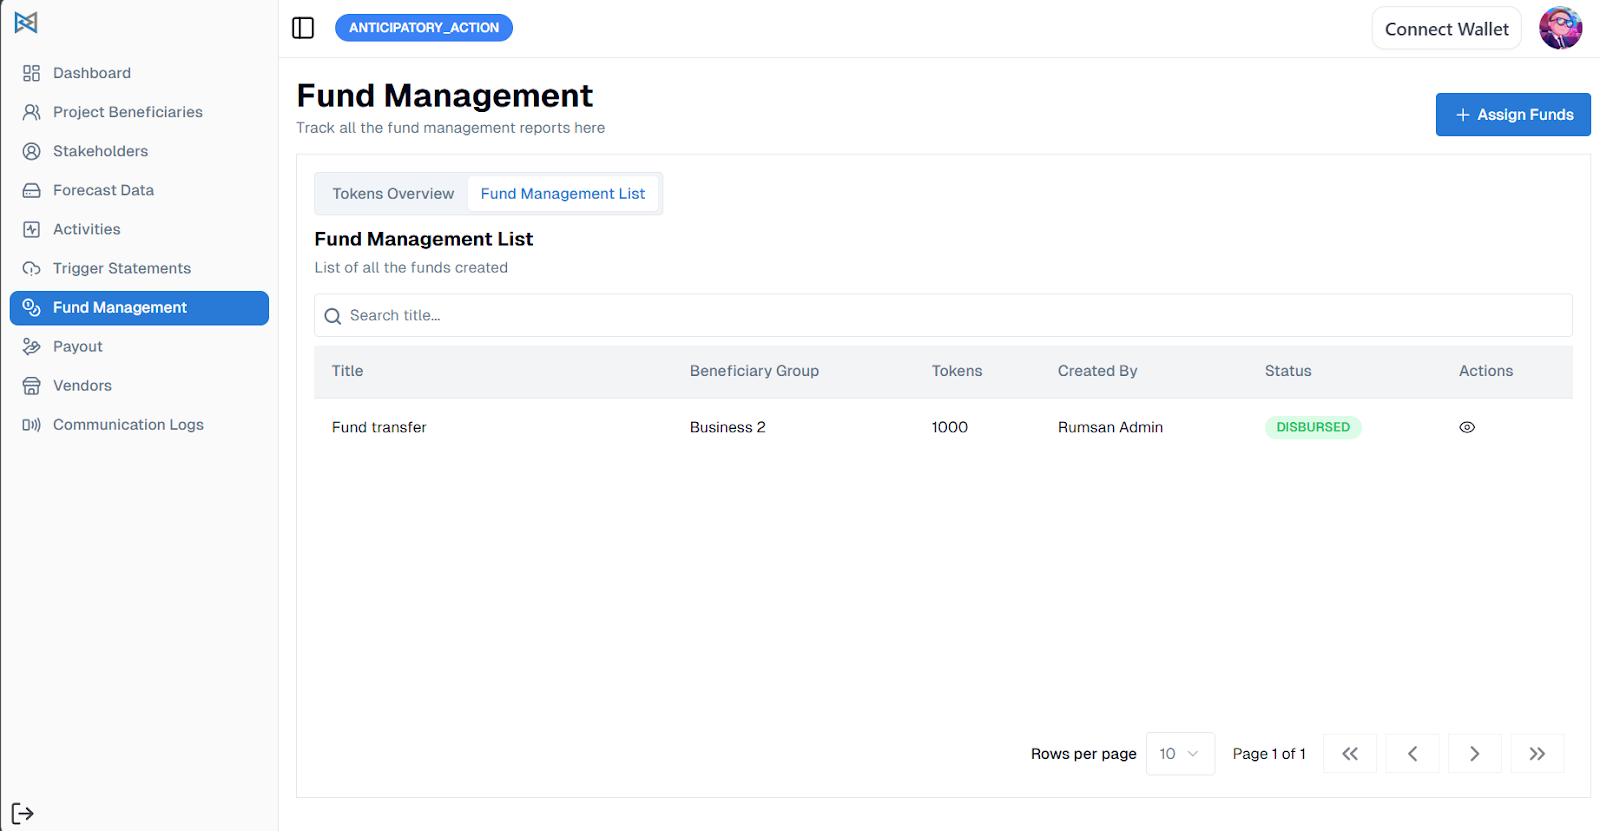
Fund Management
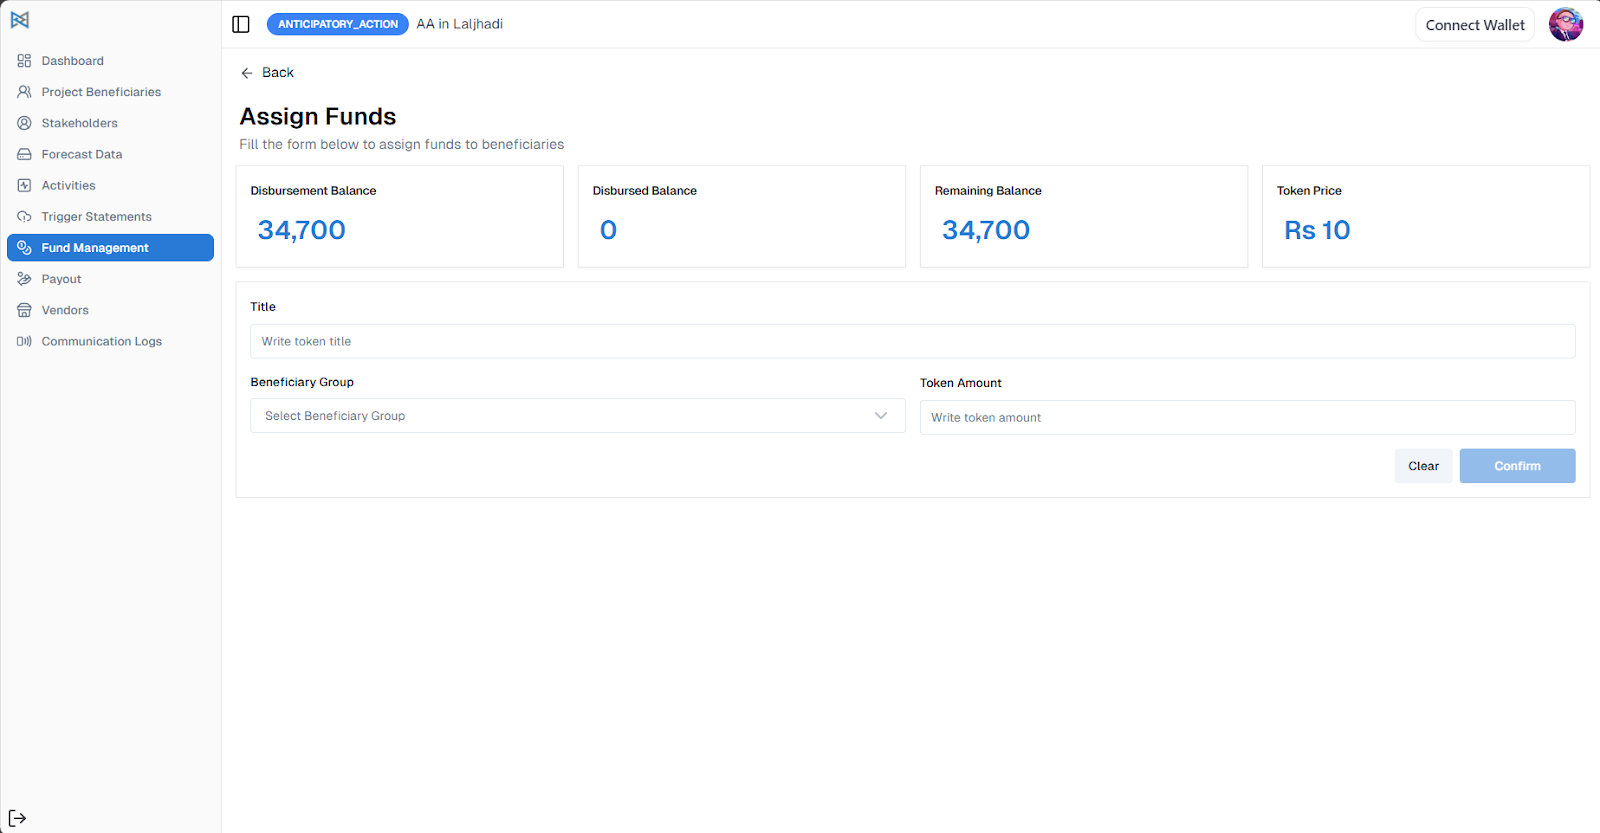
As an Admin, you can go to Fund Management and assign token funds to the beneficiary groups.
Click on Assign Funds and you will view a form where you can:
- Select Beneficiary Groups assigned to the project
- Add the amount of tokens to be assigned to the beneficiaries
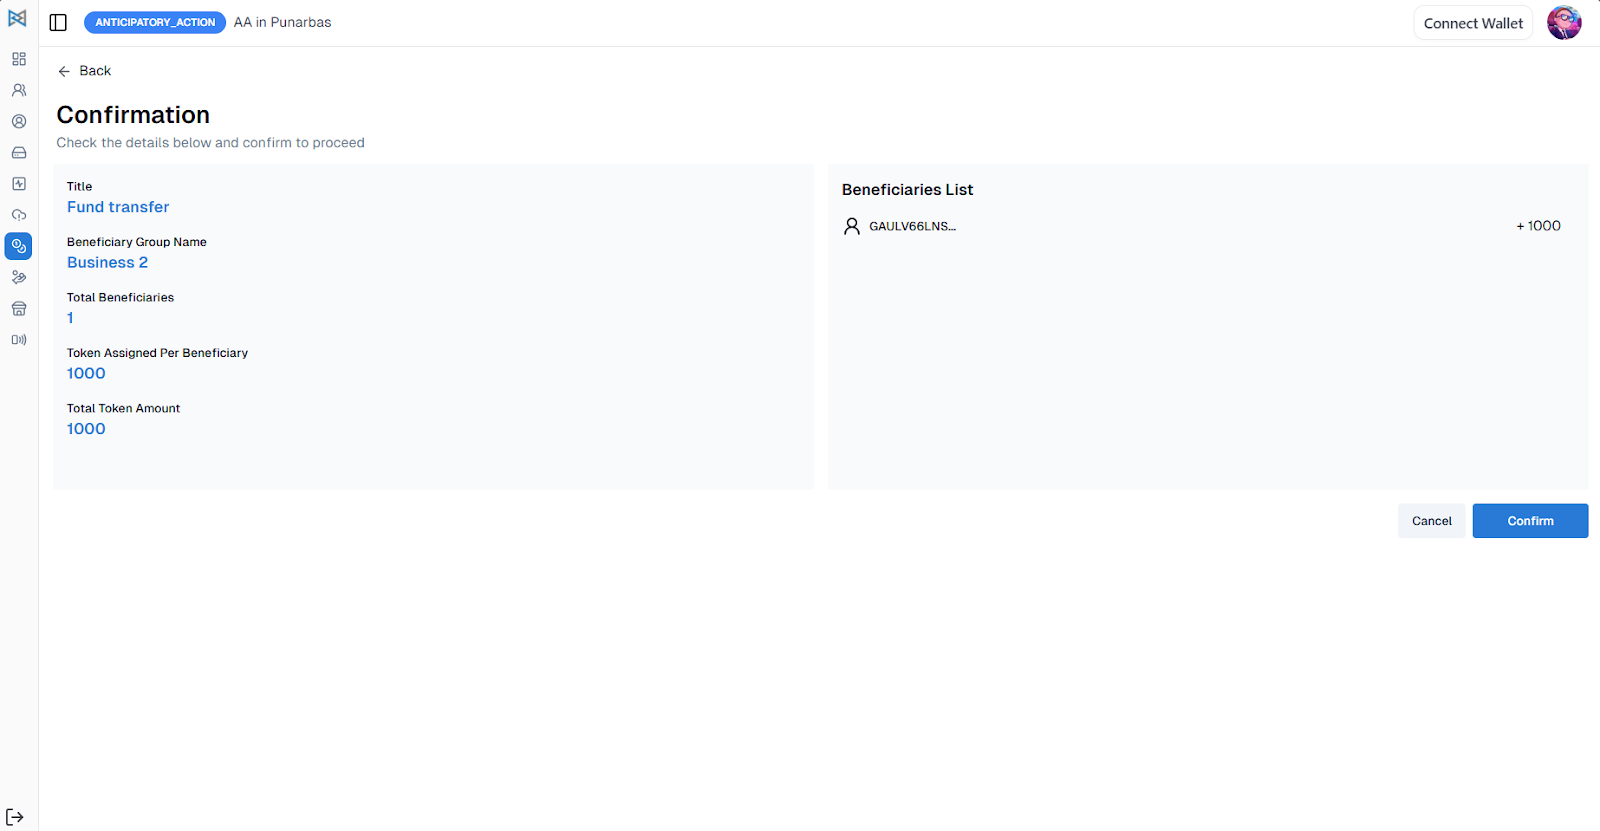
As you confirm the Fund Management, you can view its detail page and confirm. The Token Reserve will be added.
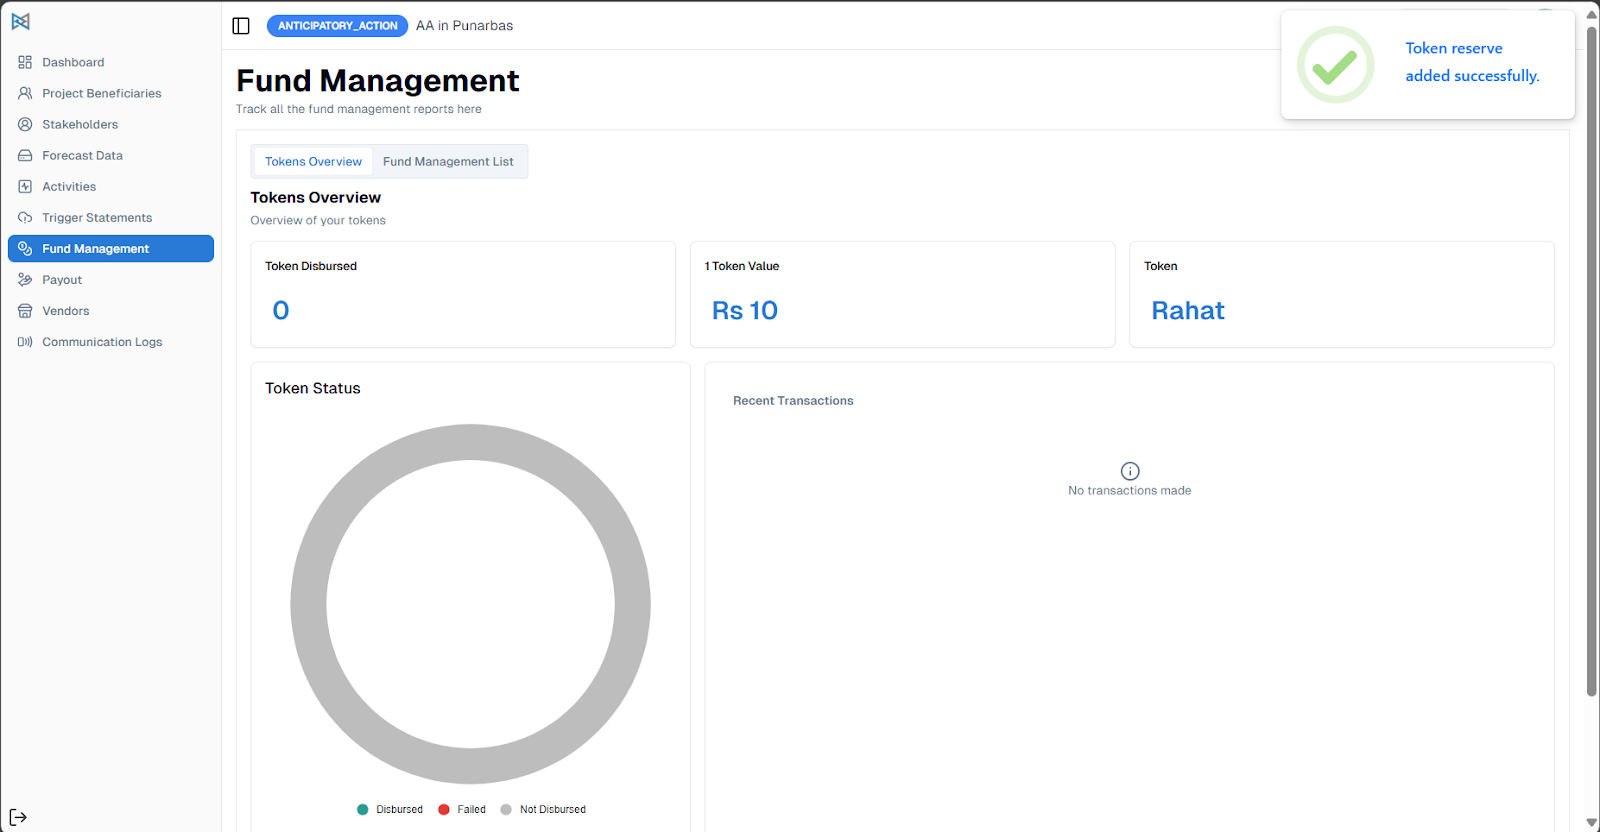
Now you can go to the Fund Management List and view the Fund Management Details.
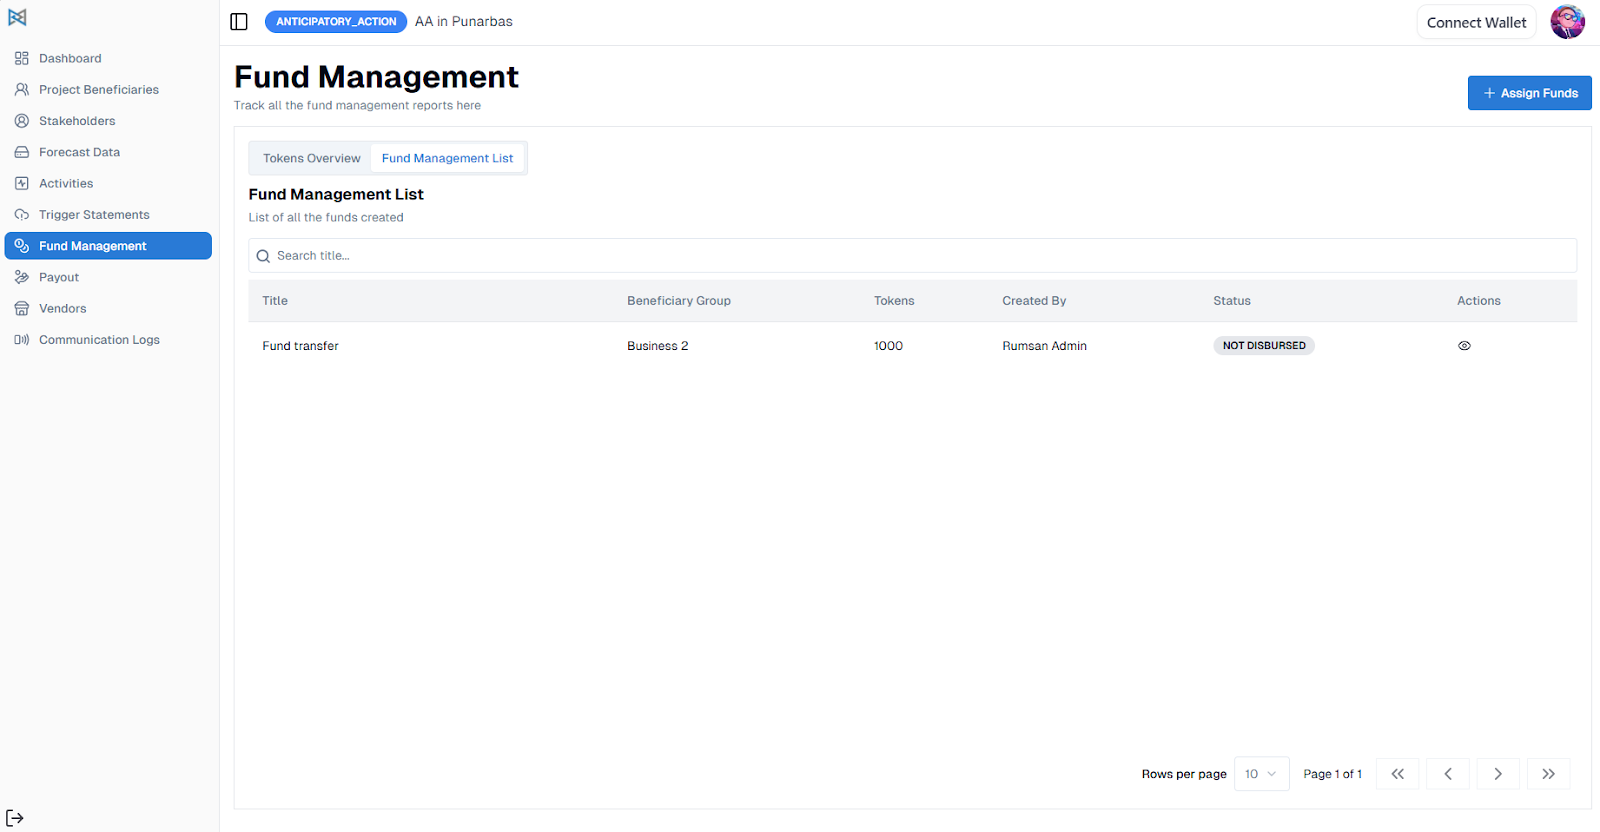

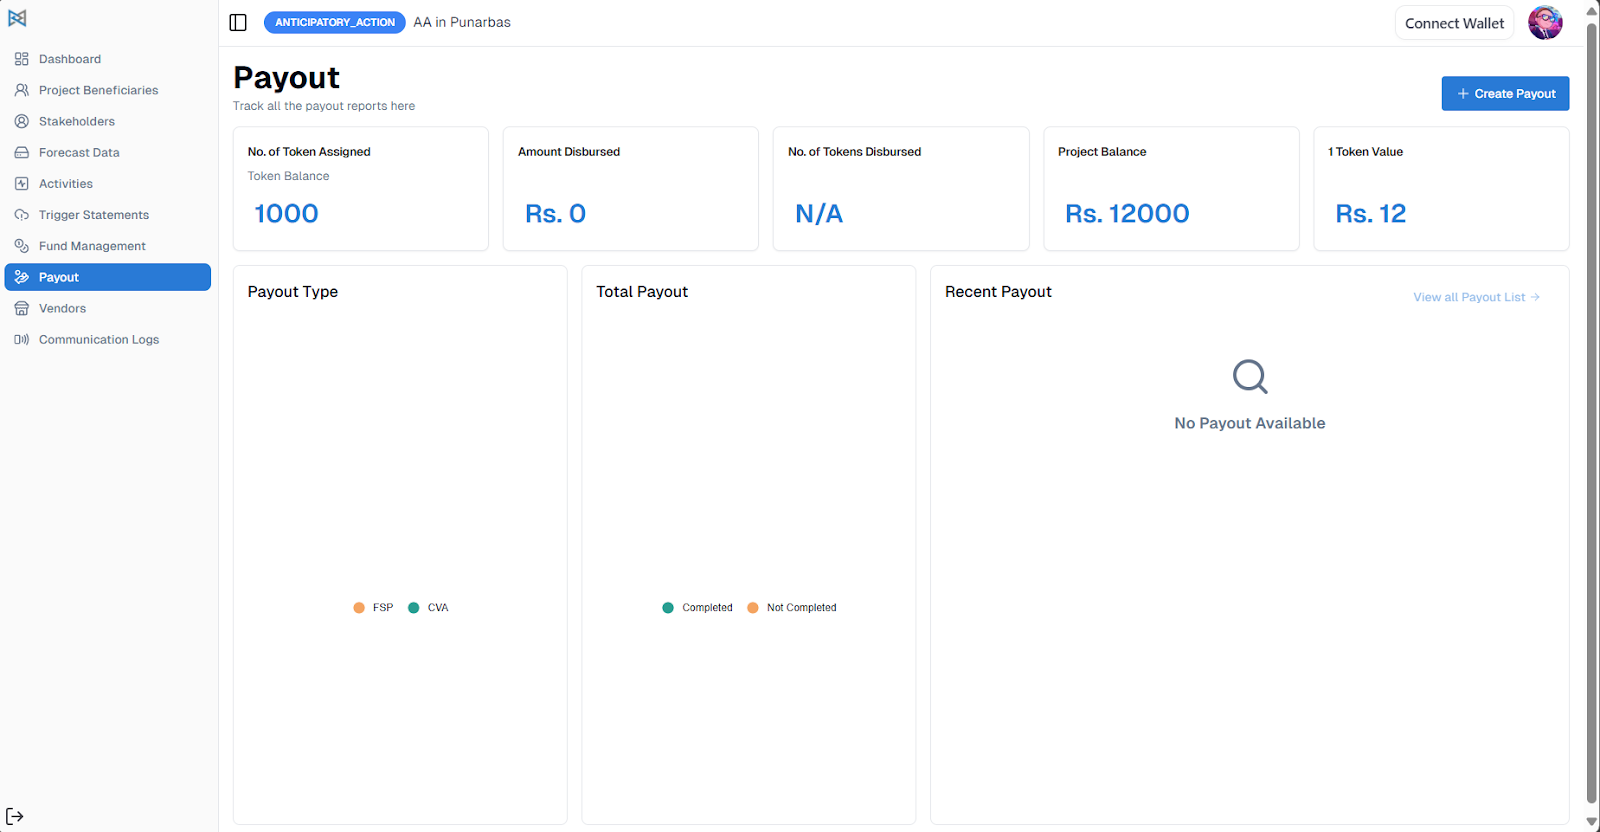
As the Activation Phase is triggered, the funds will be disbursed automatically. Now, to transfer the funds to the beneficiary bank account, go to Payout.
Payout
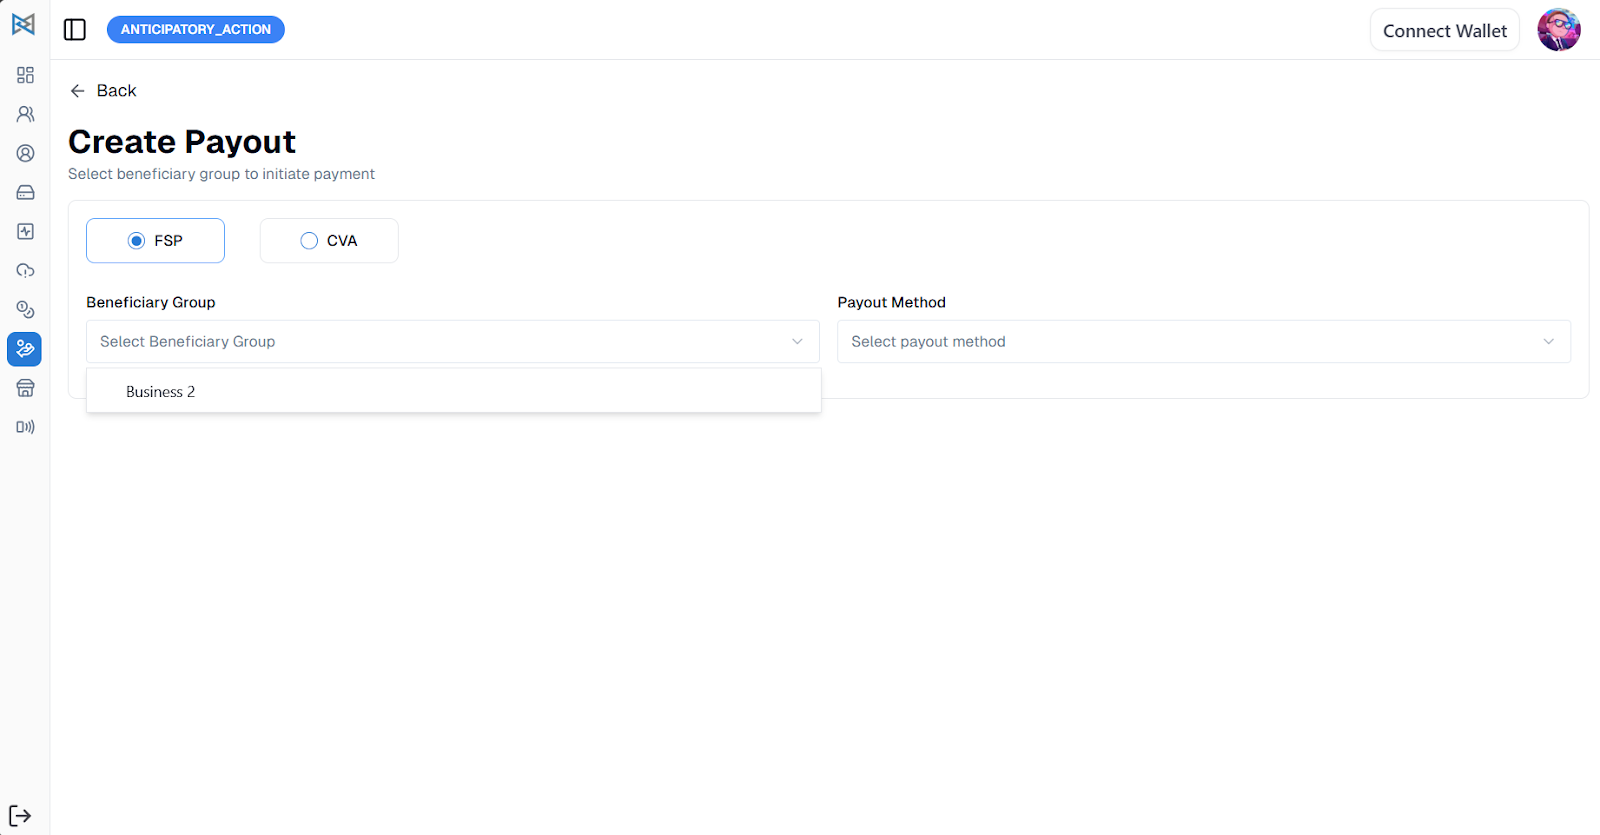
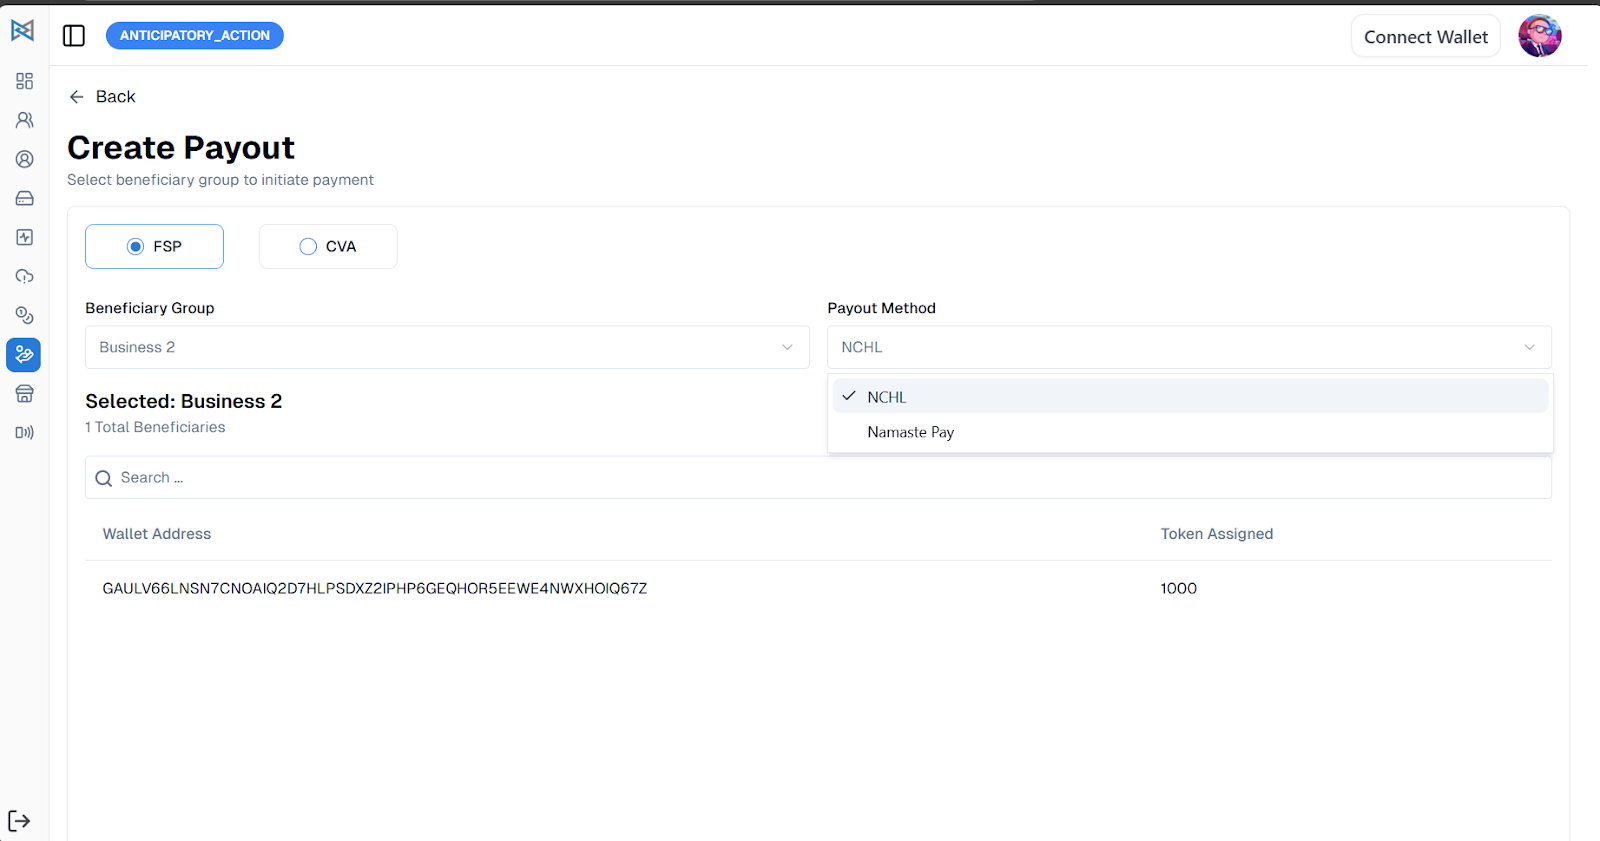
In the payout section, you can initiate payout by clicking on the “Initiate Payout” button.
You can select FSP or CVA process.
For the FSP process
- Select the beneficiary group (the beneficiary group list only appears if the fund management has been disbursed)
- Select the payment method
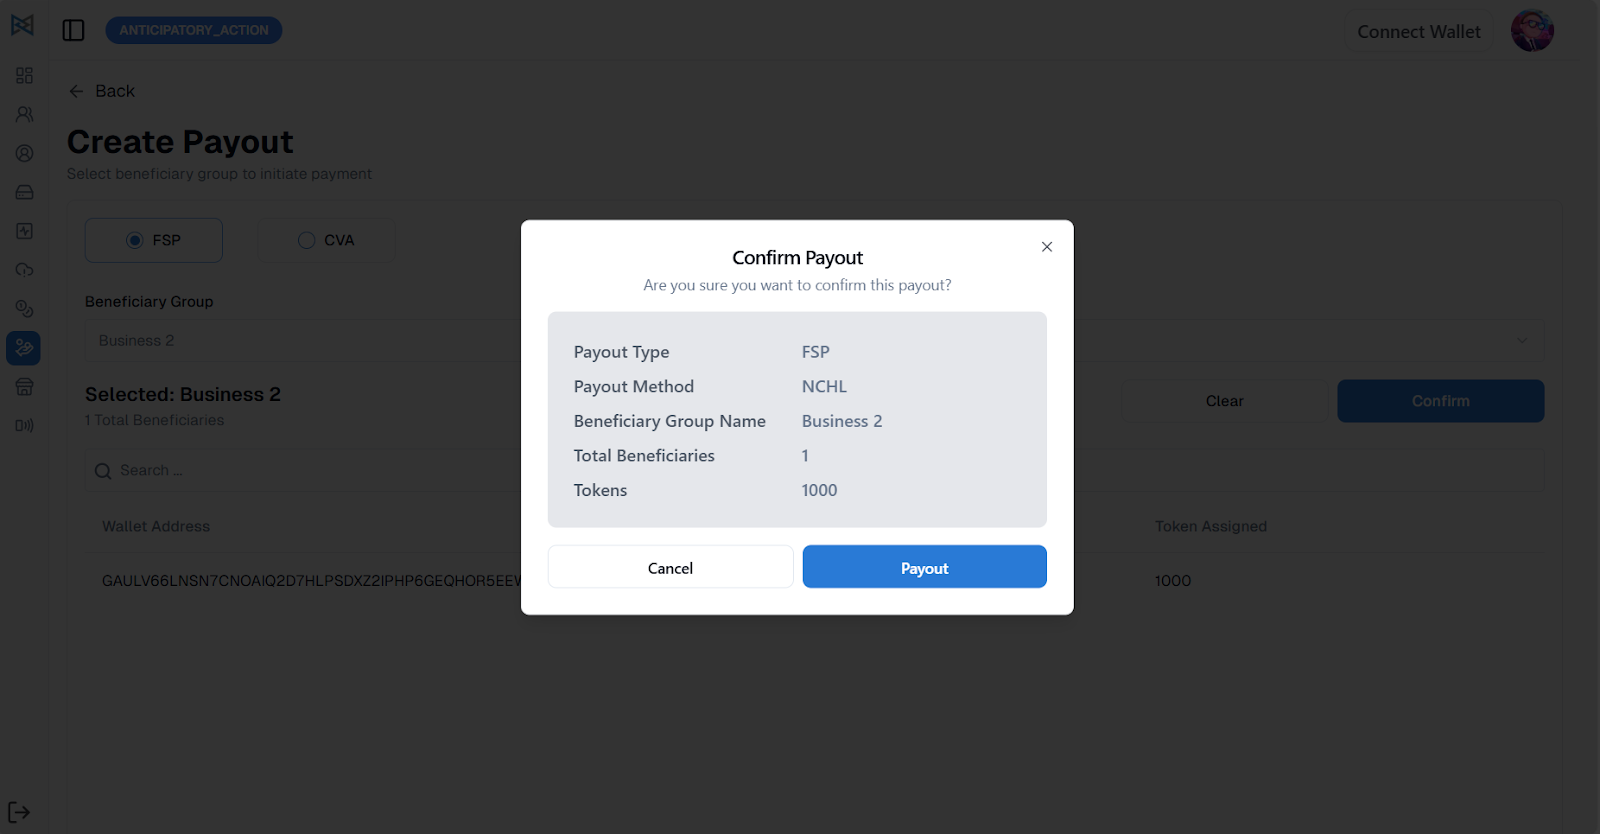
- Confirm the payout transaction
Now confirm the payout by reviewing the details of the payout, and create a payout transaction.
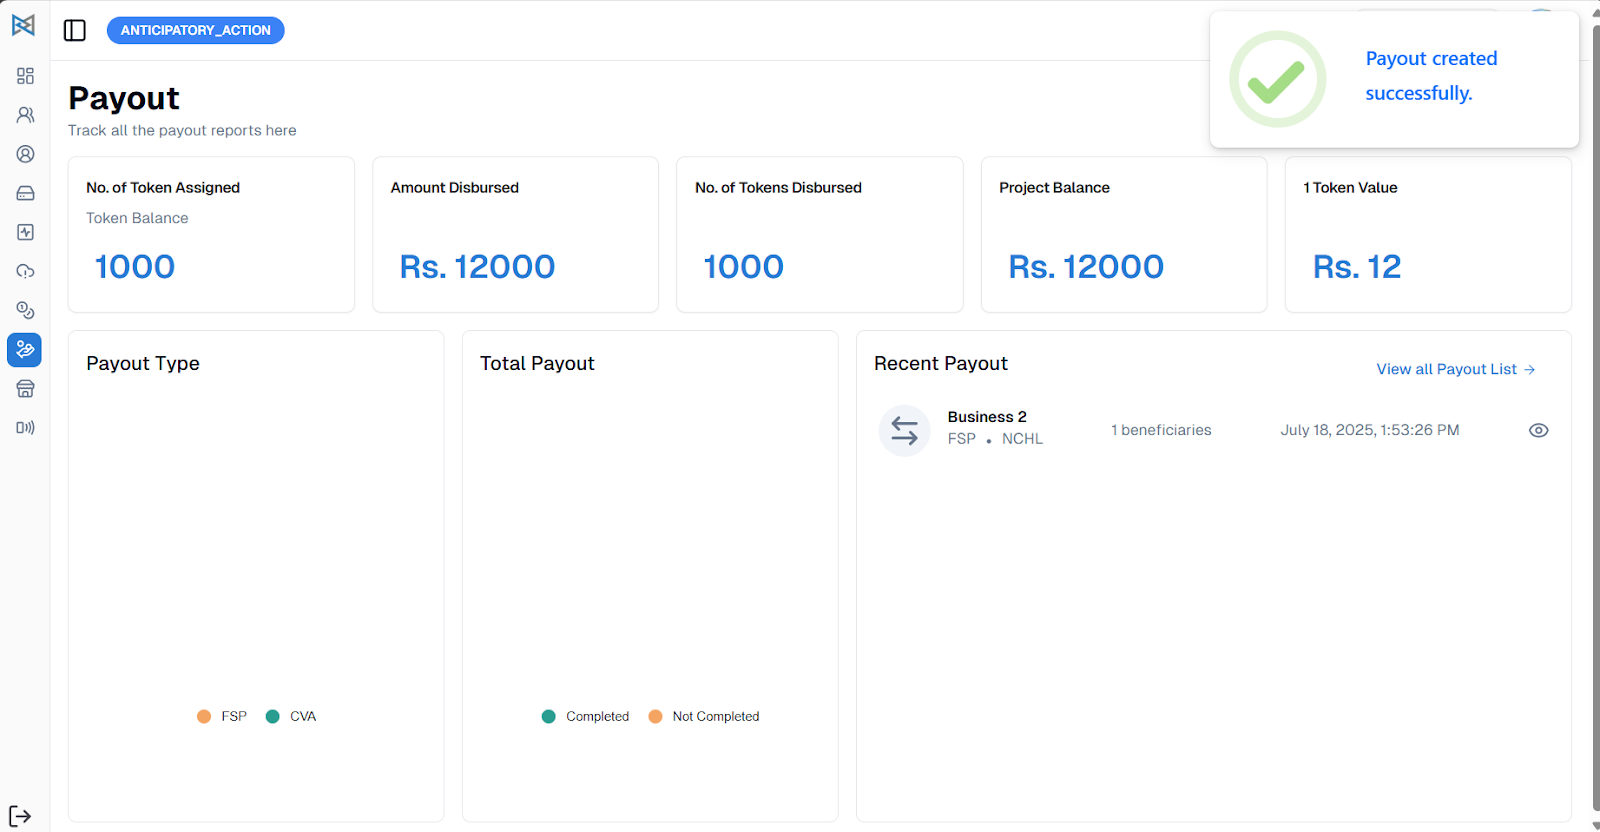
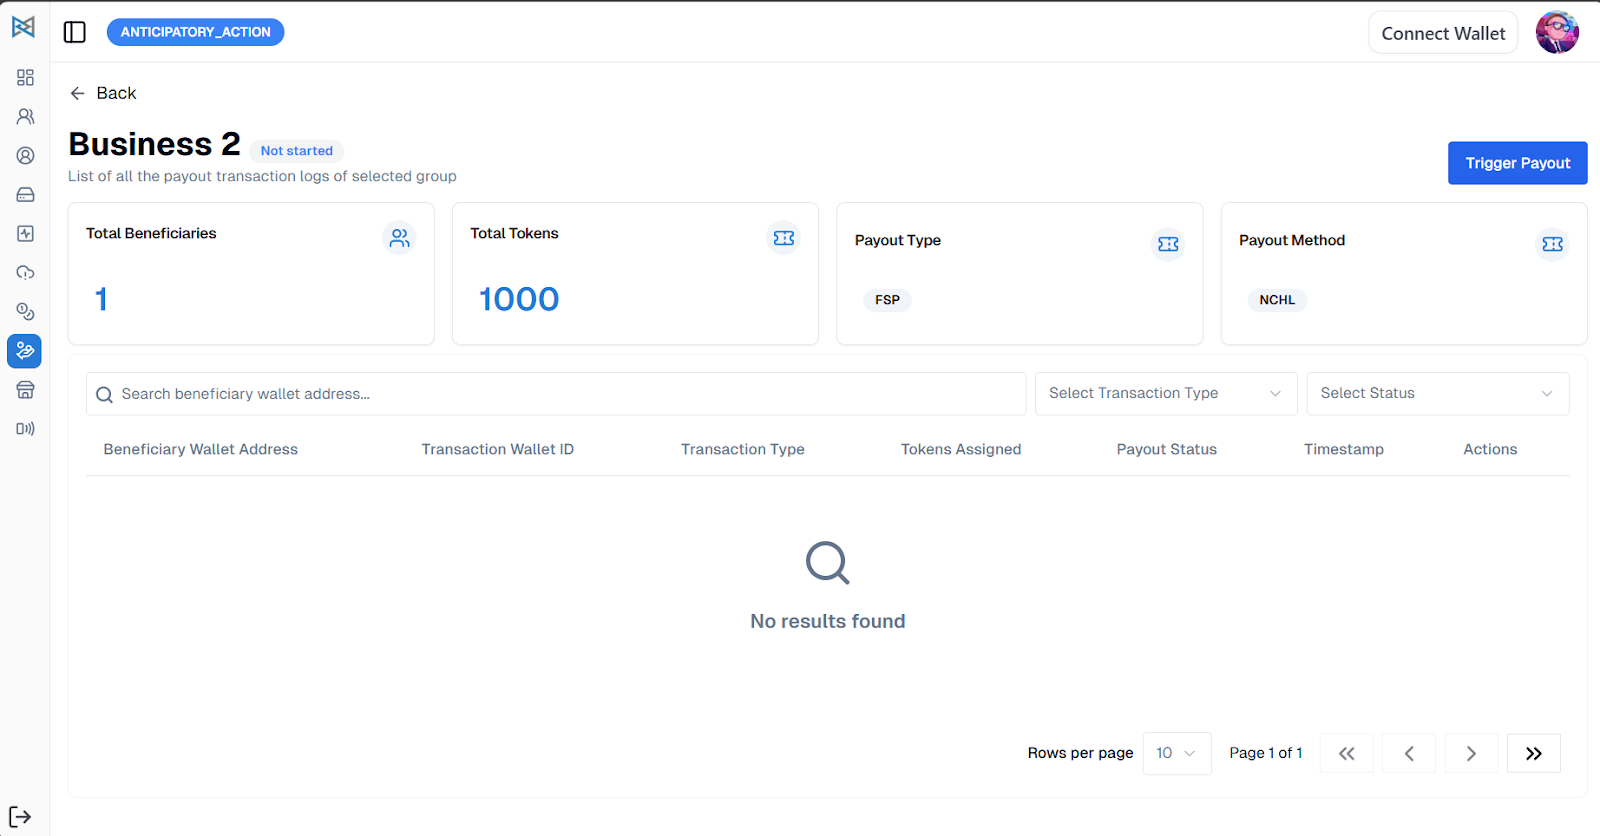
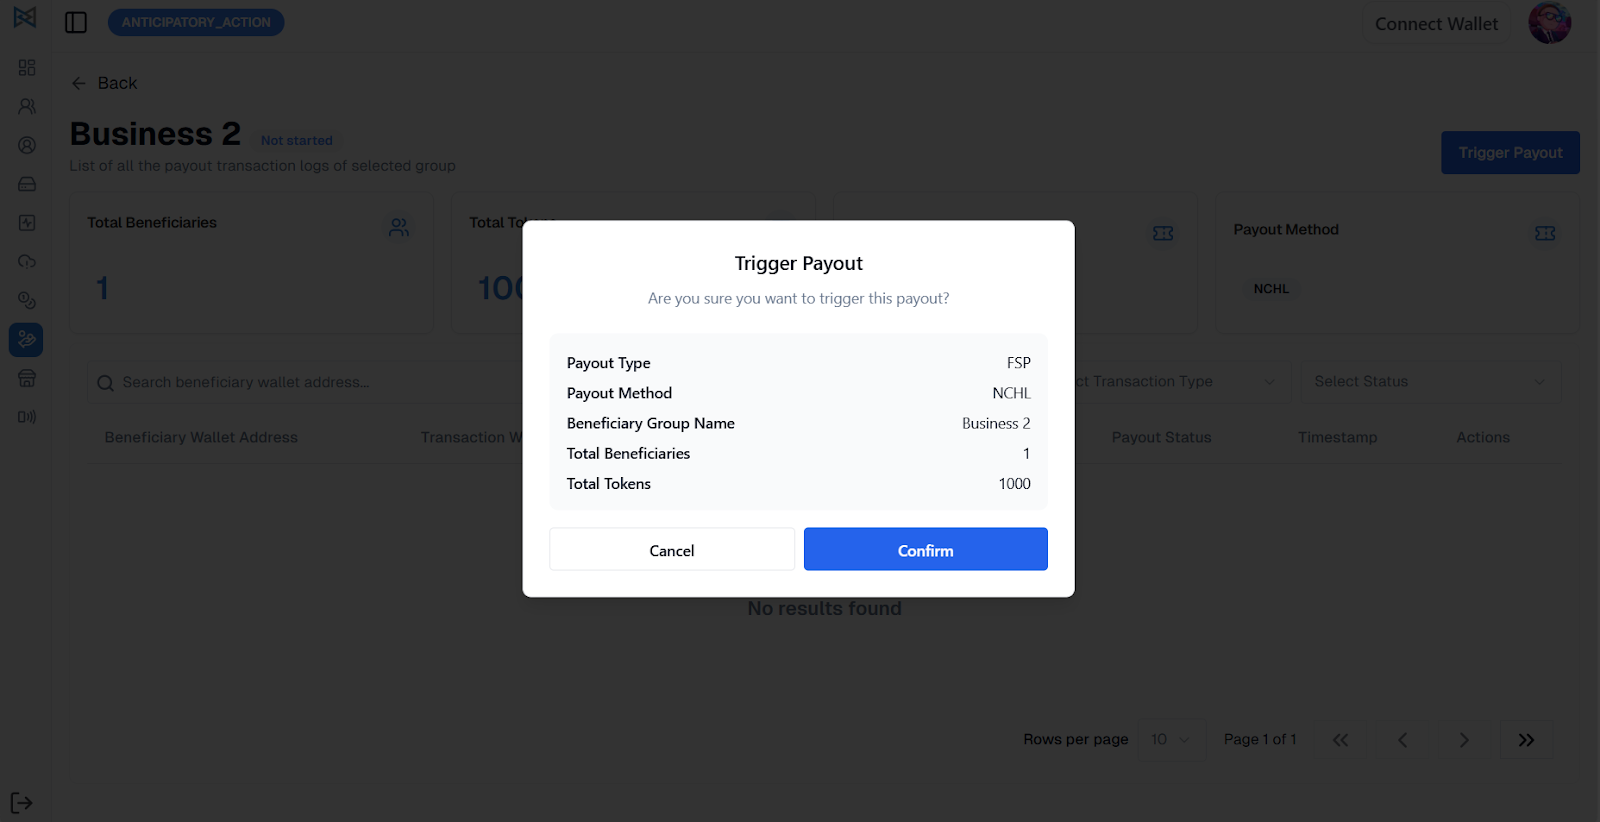
Now to trigger the payout, go to the view icon in the Recent Payout section and click on the “Trigger Payout” button.
You will be required to confirm the payout transaction, and the Trigger Payout process will be completed.

As the payout is updated successfully, first the token transaction will be initiated, followed by the Fiat transaction.
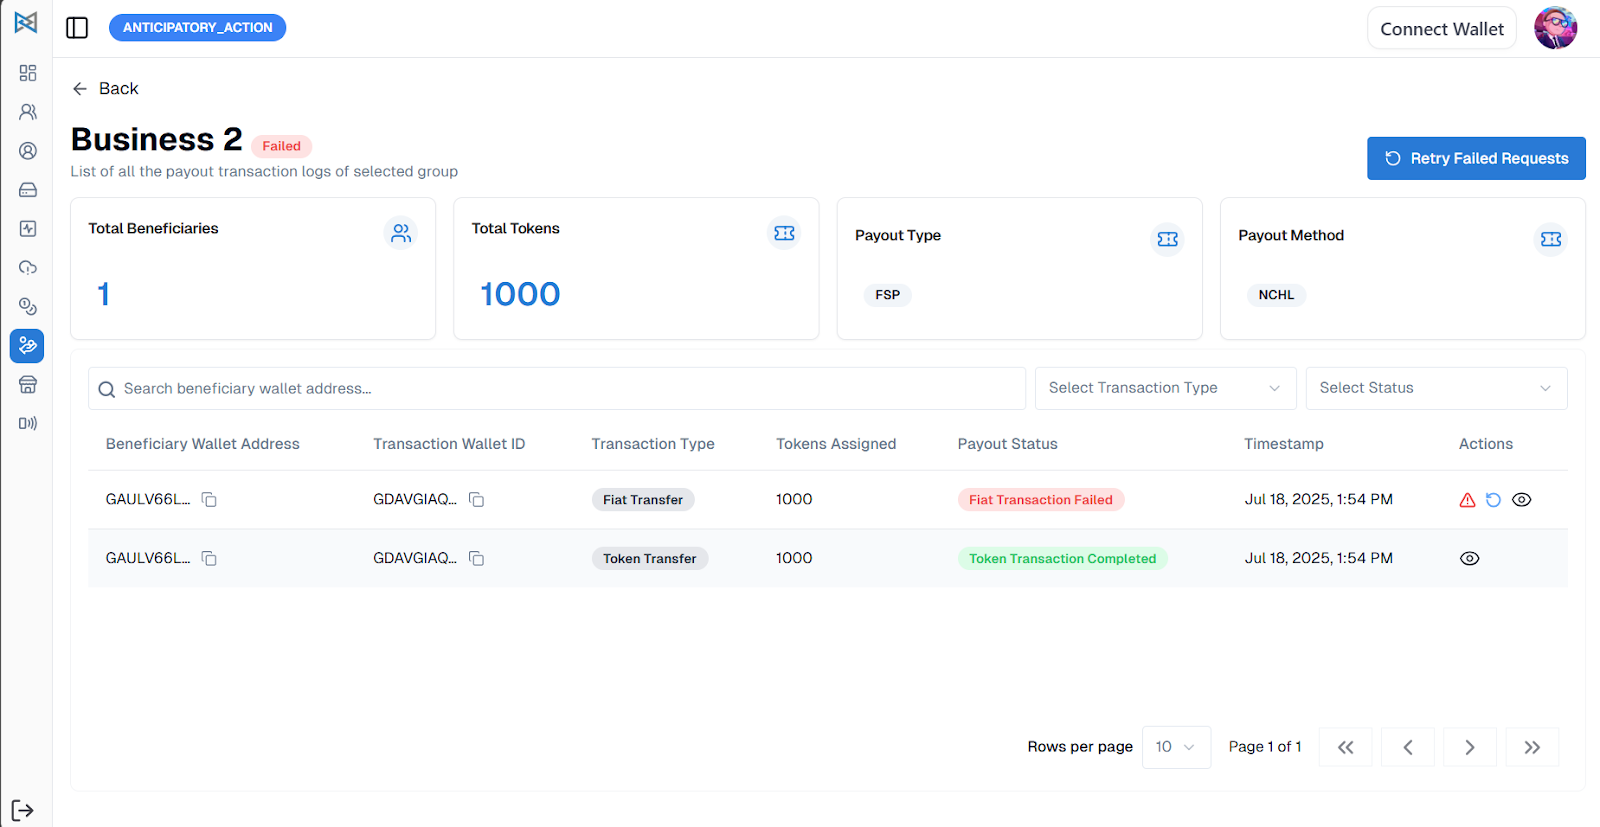
In the image above, you can view two different types of transactions. The token transaction is completed, but the fiat transaction has failed.
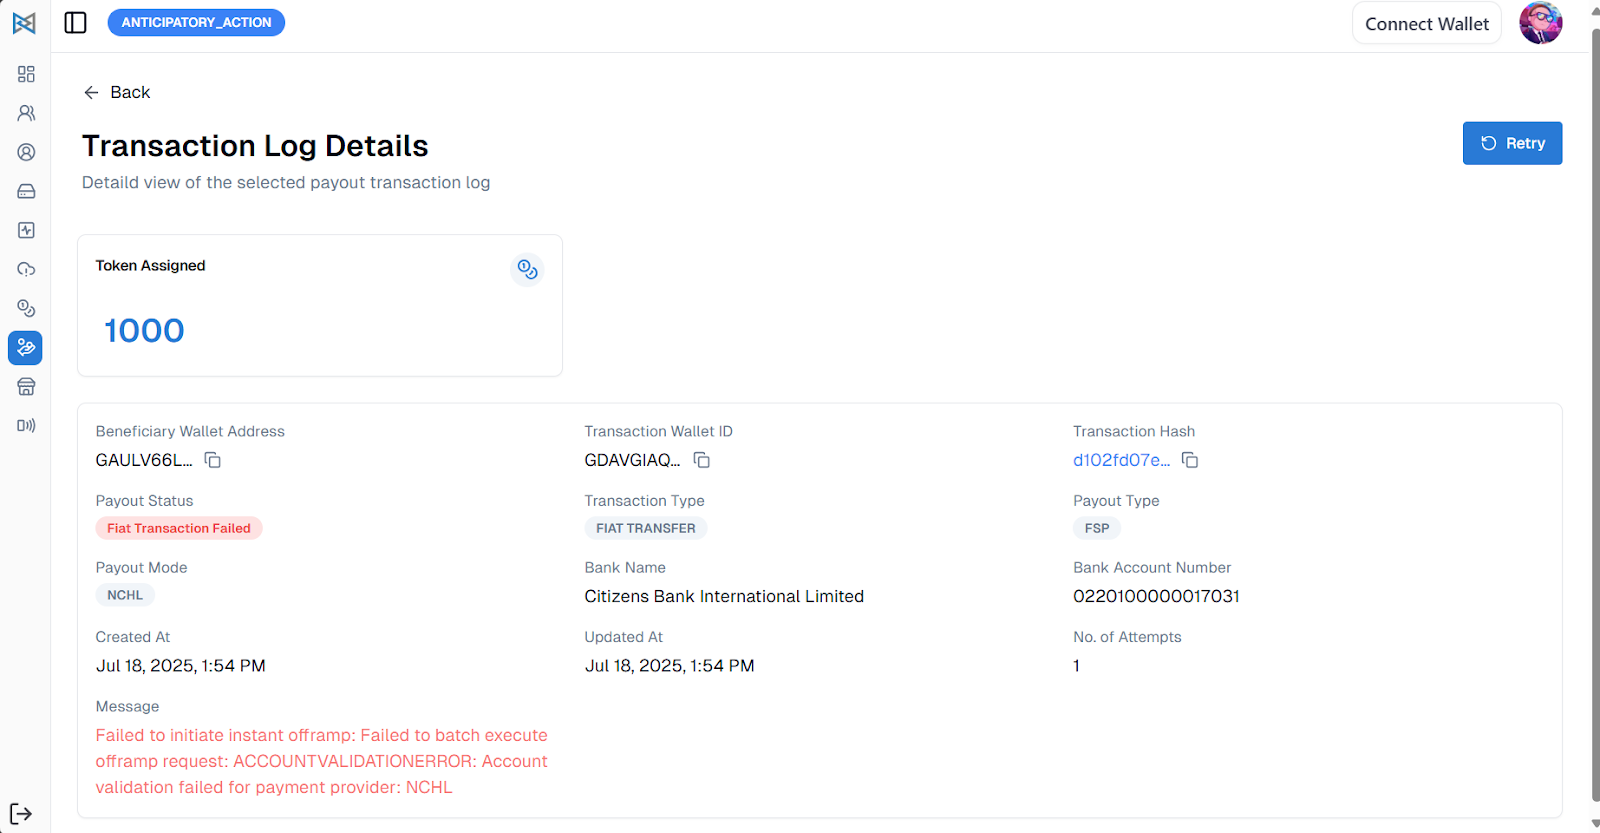
To view the details of the transaction failure, go to the View button.
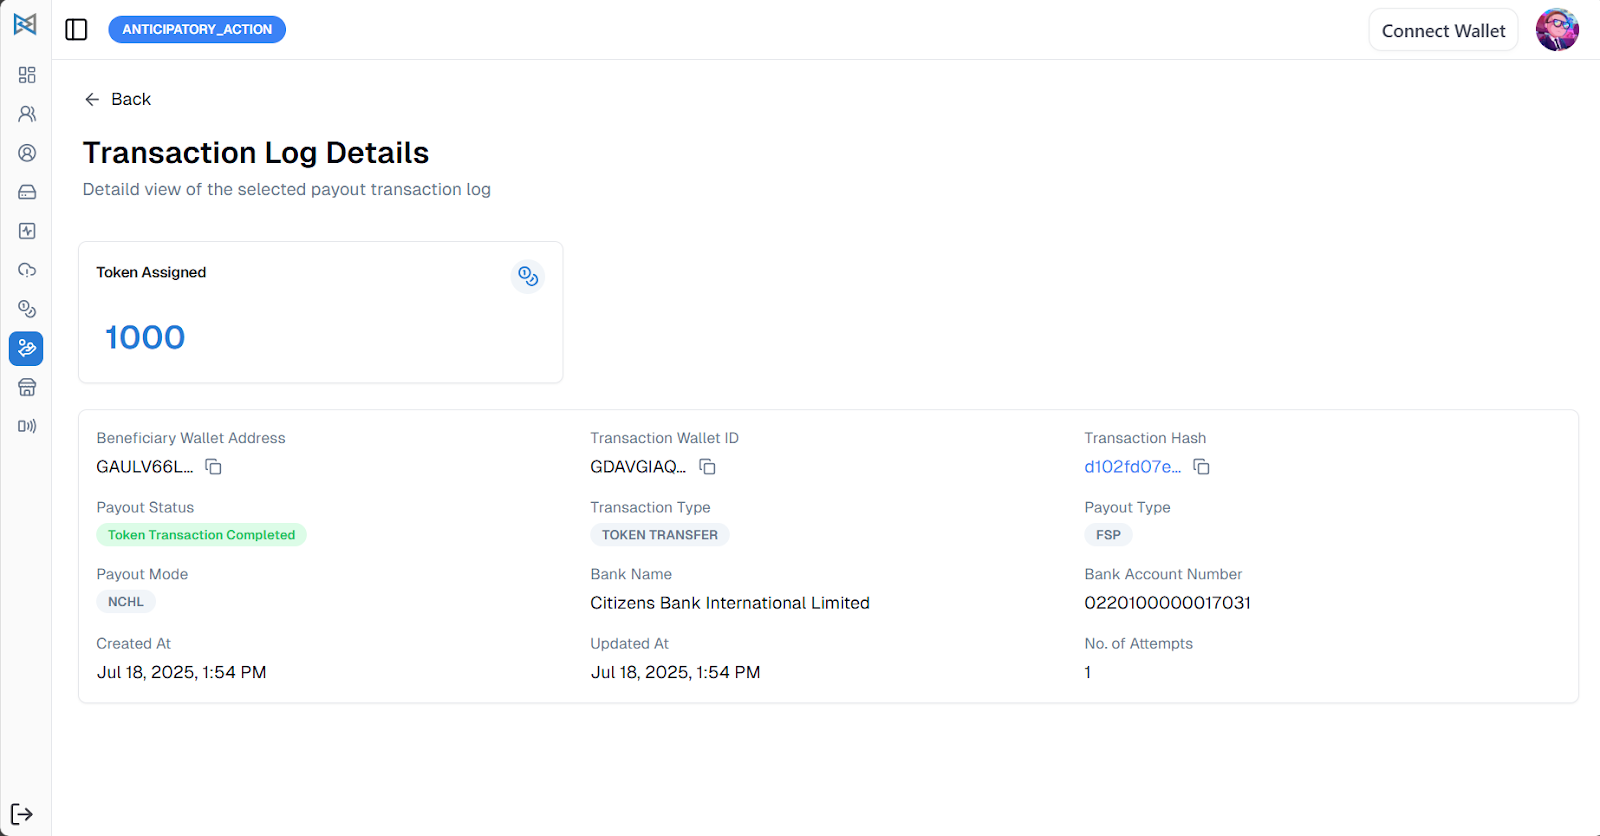
In case of a successful fiat transaction, the screen will appear like the image below:

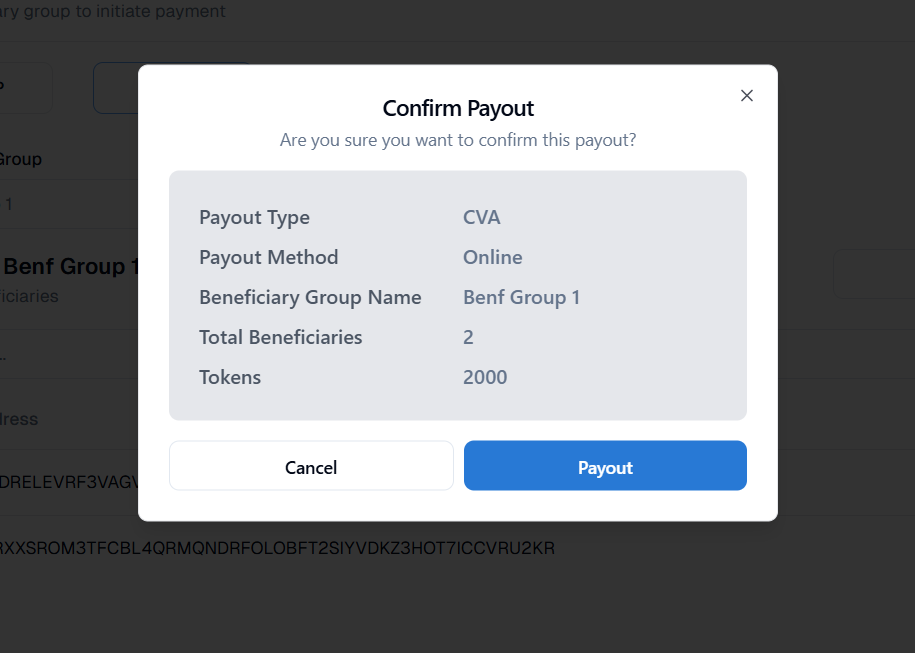
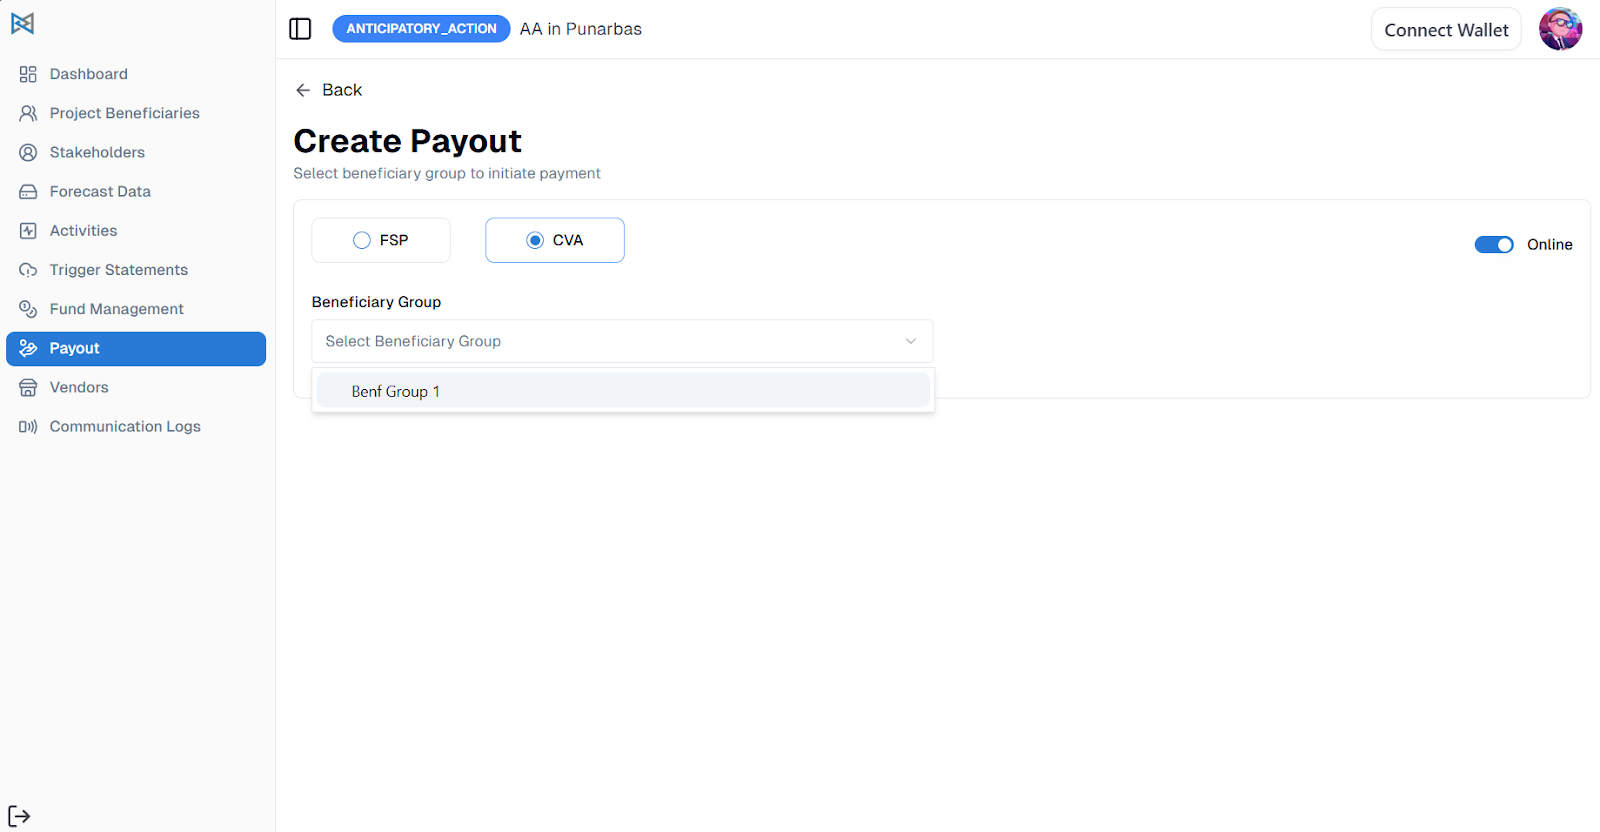
For CVA Payout Process:
- Select the CVA option and choose the beneficiary group.
- Manage whether the transaction is online or offline using the toggle button.
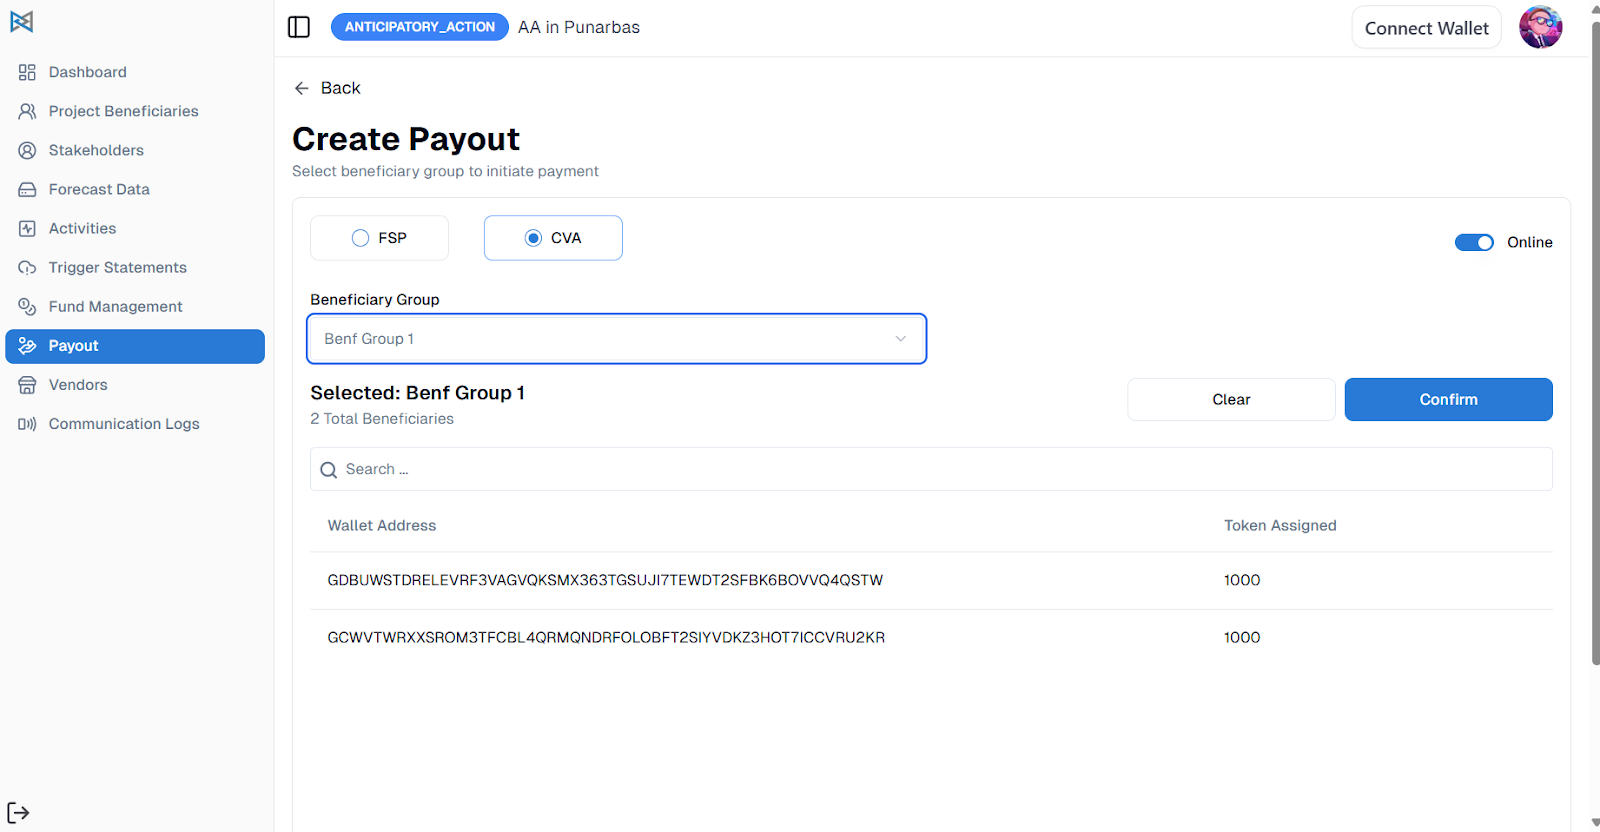
Now confirm the CVA payout process.